


































































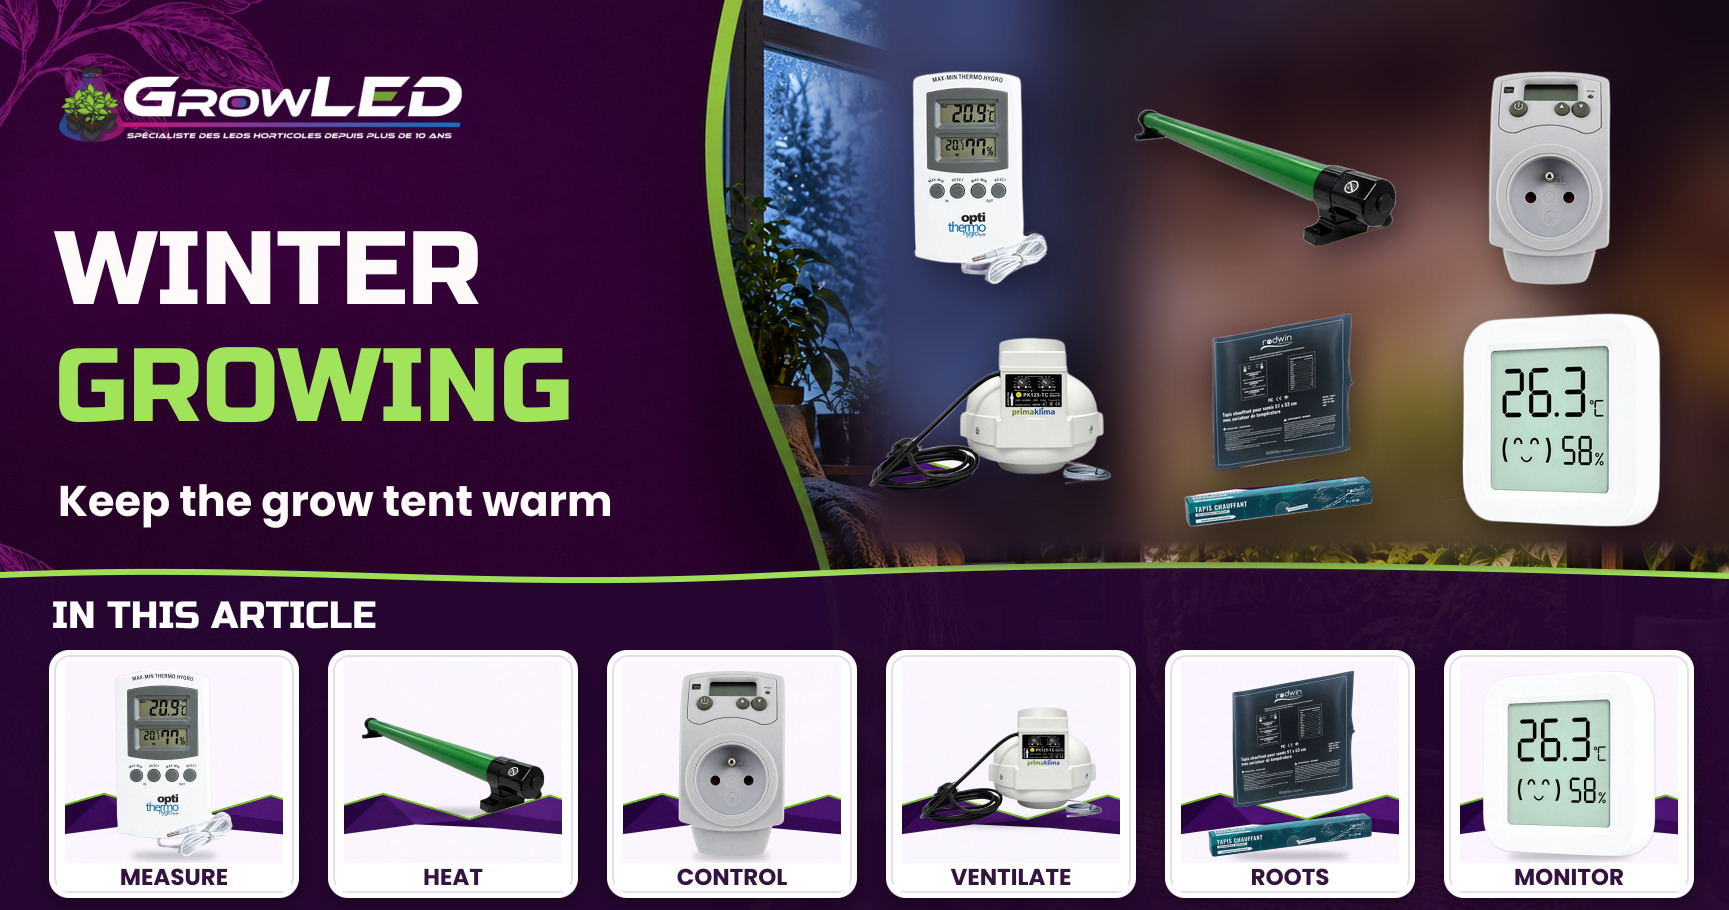
Every winter, I get the same messages: "my tent dropped to 12°C last night" or "my plants have stalled since the season changed". Cold isn't something you handle at random, you measure it, heat against it and regulate it in that precise order. Here's the method I use myself, step by step, with the tools that genuinely make a difference.
1Measure before you act: the foundation of any winter diagnosis
Before buying any heater at all, I always start by understanding what's really happening inside the tent between midnight and six in the morning. That's when everything is decided in winter: the room cools down, the household heating ticks over on low, and the gap between the daytime temperature (often fine) and the night-time temperature (often disastrous) can reach several degrees without you noticing.
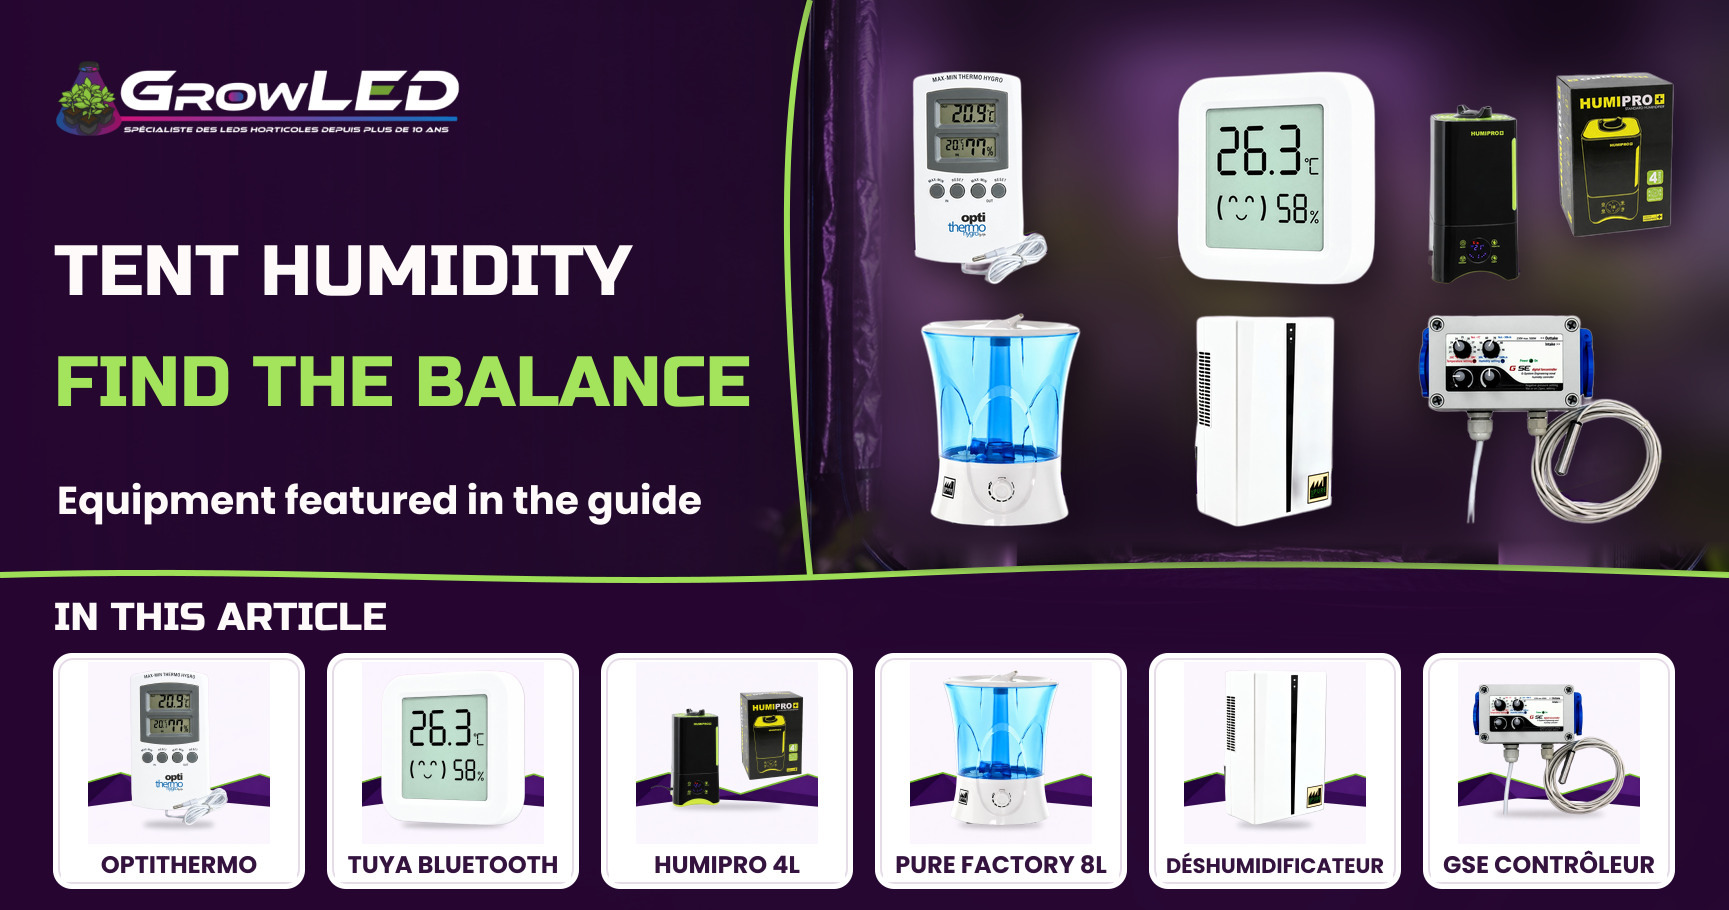
The simplest first step is to start with the Optithermo Digital Hygro Thermometer Medium. It's the most requested product in the whole range, and for good reason: its measuring span from -10°C to +50°C comfortably covers the needs of a standard winter watch, and its min/max memory function is precisely what a plain thermometer lacks. A single glance when you wake up is enough to know the lowest temperature of the night, without having to get up at 4am to check.
To go further, particularly if you grow in pots with a sensitive root system, the Digital Hydro Thermometer with probe is on another level: three simultaneous probes, one of them amphibious to sink straight into the substrate, an accuracy of ±1°C and ±5% relative humidity, and an extended span from -50°C to +70°C. The concrete benefit: the ambient air can read a perfectly fine temperature while the substrate itself has dropped below the root establishment threshold. Without a dedicated probe, that gap goes completely unnoticed.
- What to watch in winter: the minimum night-time air temperature, the substrate temperature (often more stable but sometimes colder in the event of a draught at floor level), and the humidity, which mechanically rises when cold air holds less water vapour.
- Where to place the probe: at canopy height, never pressed against an outer wall of the tent nor just above a heat source, otherwise you'll completely distort the reading.
- The good habit: record the min/max every morning for a week before investing in a heater. It's that figure, not an estimate, that sizes the right appliance.
🌱 Joseph's tip
Never press your temperature probe against the outer side of the tent wall nor just below the extractor: you'll be measuring the airflow going past, not the real temperature your plants are experiencing. Place it at foliage level, equidistant from the heater and the air outlet.

2Heating the tent with a bare heater
Once the diagnosis is done, comes the question of the heater itself. The ECOHEAT 135W GreenHouse Heater is the bare heater most chosen by growers, and its main strength lies in its IP55 rating. In winter, cold and humidity almost always come together: condensation on the walls, more frequent indoor watering, humidity creeping up. An electrical appliance with no protection against splashes in that environment is a risk I never take.
On the mounting, the ECOHEAT installs horizontally or vertically, as low as 6cm off the floor. That detail matters more than it seems: warm air rises naturally by convection, so a heater placed low pushes the heat up through the whole canopy instead of letting it stagnate at the top of the tent while the roots freeze at floor level. It's the same principle as a radiator well placed under a window rather than at the ceiling.
One important thing to anticipate: this heater has no built-in thermostat. Without external regulation, it heats continuously as long as it's plugged in, which can quickly send the tent well beyond the target threshold, especially in a small volume. So it naturally pairs with an external thermostat, a subject I detail right after.
- Safety distance: always keep enough space between the heater and the foliage or the fabric walls, even with an IP55 model, to avoid any prolonged point of contact.
- Optimal positioning: favour the bottom of the tent to make the most of natural convection rather than forcing the warm air back down.
3The special case of LED lighting
Here's a point many growers discover too late: switching to LED means gaining in light efficiency, but it also means losing a heat source you didn't even notice before. An HPS or a CMH gives off significant residual heat that, in winter, was doing you a favour without you thinking about it. An LED panel, on the other hand, converts most of its energy into useful light and far less into wasted heat. The concrete result: an LED-equipped tent is structurally colder in winter than an equivalent tent under HPS, at identical volume and insulation.
That's exactly the problem the Solux heating tube range solves, available in 60, 90 and 120cm tubes in various power ratings. Three power ratings are offered, 120W, 180W or 240W, to choose according to the size of your tent rather than at random: a small volume overcompensated by too much power creates thermal spikes, while a large under-heated volume will never close the gap created by the absence of LED residual heat.
Like the ECOHEAT, this tube is IP55 certified and does not control its own temperature: it needs an external thermostat to cut the supply once the setpoint is reached. It's a supplementary heater designed to make up a specific shortfall, not to replace a complete regulation system.
| Criterion | ECOHEAT 135W Heater | Solux heating tube |
|---|---|---|
| Target audience | All types of grow | LED setups, no residual heat from lighting |
| Rating | IP55 | IP55 |
| Format | Bare heater, mounting from 6cm off the floor | Tube 60, 90 or 120cm |
| Power | 135W | 120W, 180W or 240W depending on tent size |
| Control | Requires an external thermostat | Requires an external thermostat |
4Automating regulation: one thermostat to control it all
A bare heater with no regulation is a heater that doesn't know when to stop. That's where the CornWall Electronics Reversible Thermostat Plug comes in, the only piece in this whole guide able to control either a heater or an extractor thanks to its reversible function. In practical terms, a simple switch on the housing determines whether the plugged-in appliance should kick in when the temperature falls below the setpoint (heating mode) or, on the contrary, when it rises above it (ventilation mode).
The setpoint adjusts from 5°C to 30°C, with an accuracy of ±1°C. That's fine enough to avoid on-off cycles that are too close together, which prematurely wear out the heater and create temperature swings that stress the plants. On the power side, the plug handles a resistive load up to 3680W and 16A, which comfortably covers every heater on the market, from 20W to 2000W: whether you plug in the ECOHEAT, the Solux tube or a more powerful appliance, the margin is generous.
My field recommendation: always pair this thermostat with the bare heater chosen in section 2 or 3. Set the target a touch below your daytime goal to leave a margin, and place the thermostat's probe away from the heater itself, otherwise it will cut the appliance well before the rest of the tent has reached the right temperature.
- Step 1: choose heating or ventilation mode depending on the plugged-in appliance.
- Step 2: set the target according to the min/max reading obtained at the measuring stage.
- Step 3: position the probe at canopy height, never pressed against the heater or the extractor.
5Ventilating without throwing your heat out the window
The classic winter mistake is to think like it's summer: either you under-ventilate out of fear of the cold, at the risk of letting humidity climb and mould set in, or you keep the extractor at full tilt continuously and, in doing so, expel all the heat you just paid to produce. Neither approach works in the long run.
The solution is an extractor that makes the decision for you. The Prima Klima Thermo Controller Extractor Ø125mm 400m³/h builds a thermostat straight into the housing, set to trigger only beyond a maximum temperature threshold of 42°C. In practical terms, as long as the tent stays within a normal range, the extractor runs at minimum or stays off, which limits pointless draughts of cold air while still evacuating the humidity produced by watering and plant transpiration.
The 125mm diameter matches the standard format of most tents, and the appliance comes with a wall shutter, that little flap which closes automatically when the extractor is off. Its role is often underestimated: without it, cold outside air can flow back through the ducting even when the fan isn't running, cancelling out part of the heating effort.
🌱 Joseph's tip
Never fully block the air intake in winter to "keep the heat in". A poorly ventilated tent in winter develops condensation on the walls and the lower leaves, an ideal breeding ground for powdery mildew. Reduce the airflow, don't cut it off.
- Good practice: pair this thermo-regulated extractor with a passive rather than forced air intake, to avoid creating a negative pressure that draws in cold air continuously.
- Possible add-on: if your tent is large, the CornWall thermostat in ventilation mode can act as a relay for a second, unregulated extractor.
6Securing root establishment for cuttings and seedlings
This is the point many growers overlook in winter: a young root doesn't have the same needs as an established plant. The cutting or seedling area is often the coolest part of the setup, sometimes placed directly on a cold floor or near a window, when that's precisely where temperature matters most. Below a certain threshold, the enzymatic activity that drives root formation slows sharply, and a cutting can stall for weeks without you understanding why.
That's the job of the 40W Heat Mat with temperature controller. Placed under a seed tray or a mini-greenhouse, it heats directly from below, as close as possible to the root system, rather than trying to warm all the ambient air in the area. It's noticeably more efficient and more economical: you target the exact spot where the heat is useful, not the whole room around it.
Its built-in temperature controller lets you fine-tune the intensity, an essential point because a root that's too warm suffers just as much as one that's too cold. The target zone generally sits between 22 and 25°C at substrate level, a benchmark to keep in mind even when the room's ambient air is cooler at this time of year. Its water resistance makes it a logical ally in a cutting context where splashes are frequent.
- Typical setup: mat on the floor or on a shelf, seed tray or mini-greenhouse placed directly on top, with no insulating layer between the two.
- Gradual adjustment: start at half power on the controller and adjust according to the substrate probe mentioned in section 1, rather than pushing it straight to maximum.
- Watch out: check the substrate moisture regularly, constant heat at floor level dries it out faster than you'd think.
7Getting alerted before disaster strikes: connected monitoring
All this regulation works very well as long as nothing breaks down. But a thermostat that jams, a plug that trips, a heater that gives out on a bitterly cold night: it happens, and the damage often occurs between 2am and 5am, while everyone's asleep. That's exactly the gap filled by the Tuya Bluetooth Thermometer and Hygrometer.
It's the only connected device in this entire selection, and its principle is simple: a Bluetooth 5.0 BLE connection paired with the Tuya or Smart Life app lets you set high and low alert thresholds and receive a notification straight to your phone if the tent moves outside the defined range. Its measuring span, from -9.9°C to 60°C, comfortably covers winter drop scenarios.
In practice, I advise setting the low alert a few degrees above your plants' critical threshold, not right on it: that gives you time to react before the situation becomes a problem. It's not a regulation tool, it controls nothing, but it's the safety net that saves you from discovering a disaster when you wake up rather than in the middle of the night, while there's still time to act.
- Good use: keep your phone within Bluetooth range or use a compatible relay so you don't miss any night-time alert.
- Complementarity: this thermometer doesn't replace the CornWall thermostat, it watches over it. One regulates, the other warns you if the regulation fails.
Get your tent ready before the next cold snap
Measure first with a reliable thermometer, then take back control of the temperature with the CornWall Electronics Reversible Thermostat Plug paired with the heater suited to your setup, LED or not. Find the full winter selection and much more on the growshop.
See the growshop →If I had to sum up fifteen years of winters in one sentence: you don't fight the cold with a single device, you manage it with a coherent chain. Measuring without acting is useless, heating without regulating wastes energy and stresses the plants, ventilating without thermo-control throws your heat out the window. Always start with measurement, build the chain in order, and keep a connected eye on the night: it's that method, not one isolated gadget, that makes the difference between a grow that stalls in winter and one that keeps moving forward.