Aller au contenu principal
Programmers / Timers
10 produits

Programmers / Timers

Timers and Programmers: Automate Your Indoor Growing Lighting Cycles

Timers and programmers are the brains of your indoor growing setup. These devices automate your lighting, ventilation, and heating cycles to faithfully replicate natural conditions. No more forgetting or waking up at night to turn your equipment on or off!

Why choose timers f...

Timers and Programmers: Automate Your Indoor Growing Lighting Cycles

Timers and programmers are the brains of your indoor growing setup. These devices automate your lighting, ventilation, and heating cycles to faithfully replicate natural conditions. No more forgetting or waking up at night to turn your equipment on or off!

Why choose timers for your indoor grow

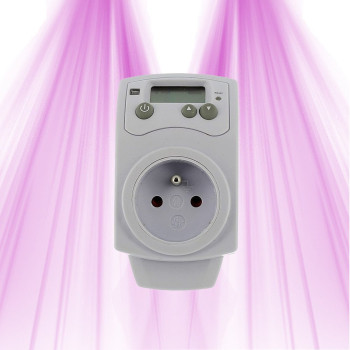
Automation completely transforms your cultivation experience. With a good timer, you scrupulously adhere to essential photoperiods: 18h/6h for growth, 12h/12h for flowering. The Digital Weekly Timer - Special Horticultural LEDs Timer excels in this area with its quarter-hour precision. Digital models offer enormous flexibility: 8 different programs, irregular cycles, dawn and dusk simulation. For professional installations, the Digital Weekly Timer - For DIN Rail Mounting - 8 Programs mounts directly into your electrical panel. Automation isn't just for lighting: the Reversible Hygrostat Socket 220V - Cornwall Electronics automatically regulates humidity, while the Wireless Reversible Thermostat - LightHouse manages temperature remotely.

How to choose the right timer

The choice depends on your setup and your needs. For beginners, a mechanical timer is sufficient: simple, reliable, no risk of losing programming. Digital models are suitable for demanding growers who want complex cycles. Check the maximum supported load: 3500W for most, largely sufficient for LEDs but be careful with HPS. Timers specialized for LEDs include protections against induced currents that can disrupt electronics. For ventilation, opt for models with a reversible function: they activate the extractor when the temperature or humidity exceeds the set threshold. Wireless versions offer appreciable ease of use, especially for hard-to-reach spaces.

Frequently Asked Questions

What is the difference between a mechanical timer and a digital timer?

A mechanical timer works with a rotating disk and pins to be positioned manually. Simple and robust, it offers 15-minute precision and is not affected by power outages. A digital timer uses an LCD screen and allows programming to the nearest quarter hour with several cycles per week. It can store up to 8 different programs but requires a backup battery in case of a power cut. Digital timers are better suited for complex cycles and dawn/dusk simulations.

How do I correctly set my timer to respect 18h/6h cycles for growth and 12h/12h for flowering?

During the growth phase, program 18 continuous hours of light followed by 6 hours of total darkness. For example: turn on at 6:00 AM, turn off at 12:00 AM. For flowering, switch to 12h/12h, keeping the same turn-off time to avoid stress. Darkness must be absolute during the "night" phases - no light pollution tolerated. On digital timers, use the "daily" mode for these regular cycles. Gradually change the schedules if necessary, in increments of no more than 30 minutes per day.

My timer is no longer working correctly and the light stays on or off: how do I diagnose and fix the problem?

First, check the power supply and programming: are the pins correctly positioned on a mechanical model? Is the backup battery dead on a digital one? If the light stays on continuously, the problem often comes from a welded contact in the internal relay. Test in manual mode if possible. For LEDs, check that the timer supports inductive loads – some older models are not compatible. As a last resort, replace the timer: it's a wear-and-tear item that should be replaced every 3-4 years with intensive use.

Which timer should I choose to avoid induced current problems with my LEDs and ensure good waterproofing?

LEDs generate induced currents that can disrupt classic timers. Opt for models specifically designed for LED lighting with integrated protection against interference. Check the IP rating: IP44 minimum for humid environments, IP65 for enhanced waterproofing. DIN rail timers offer better protection because they are housed in the electrical panel. Avoid budget options that do not include these protections – a malfunction can ruin an entire crop.

How do I install and synchronize my timer with my air extractor to optimize ventilation in my grow room?

Ideally, the extractor should run continuously during lighting phases and be reduced by 50% during darkness. Use a timer with a reversible function or two separate timers. Synchronize the schedules: extractor running 15 minutes before the lights turn on to pre-cool the space. During the night, maintain minimal ventilation to prevent stagnant humid air. Thermostats and hygrostats automate this management by activating extraction according to the temperature and humidity thresholds you define.

Showing 1 - 10 of 10 items
How to choose a timer for indoor growing?
   

To choose a good timer, I first look at the maximum supported power, which must be greater than that of all the devices you will connect to it. Then, I consider the precision: a digital timer offers better accuracy for short cycles. Finally, I think about the ease of programming and the brand's reliability, because a faulty timer can ruin a harvest.

What is a timer used for in indoor growing?
   

A timer is essential for automating light cycles, ventilation, and sometimes heating in your grow space. It allows you to simulate sunrise and sunset, thus ensuring a stable biological rhythm for your plants. In practice, this frees you from the constraint of manually turning your equipment on or off, and ensures crucial consistency for the growth and flowering of your plants.

What is the difference between an analog and a digital timer?
   

The main difference lies in precision and flexibility. Analog timers are mechanical, often with pins to push in, and are robust but less precise (in 15 or 30-minute increments). Digital timers, on the other hand, offer minute-by-minute precision, several different programs, and sometimes additional functions like a countdown or a backup battery. I recommend digital for cultures requiring precision.

How to install a timer for LED lighting?
   

Installation is generally simple. I first plug my timer into a wall outlet. Then, I connect the cable of my LED lighting directly to the timer's outlet. All that remains is to program the on and off times according to the desired light cycle for my plants. Make sure the timer is properly sized for the power of your LED lighting.

What lighting cycle should I program for growth?
   

For the vegetative growth phase, I generally program a cycle of 18 hours of light and 6 hours of darkness (18/6). This rhythm allows plants to maximize their photosynthesis while benefiting from a rest period necessary for their development. This is a very common and effective cycle for achieving vigorous growth before flowering.

What mistakes should be avoided with indoor timers?
   

The first mistake to avoid is to overload the timer by plugging in too many devices or equipment that is too powerful, which can cause overheating or malfunction. Then, I often see forgotten checks: you need to regularly ensure that the timer is working correctly and that the time is still accurate. Finally, not respecting the light cycles can stress your plants, so always check your programming.

Which timer should I choose for multiple devices?
   

If you have several devices to control, I advise you to opt for a multi-socket timer or an electrical panel timer if you are comfortable with this type of installation. Otherwise, you can use several individual timers, but make sure they are all synchronized if the devices need to operate at the same time. The important thing is never to exceed the maximum capacity of each socket and the timer itself.

How to program a timer for the flowering phase?
   

For the flowering phase, I change the light cycle to a rhythm of 12 hours of light and 12 hours of darkness (12/12). This prolonged period of darkness is crucial because it triggers the production of flowering hormones in most plants. It is imperative that the period of darkness is total and uninterrupted to avoid any light stress that could disrupt flowering.

What power outlet for a lighting timer?
   

I recommend always choosing a timer whose maximum supported power is greater than the total consumption of the lighting you will connect to it. In general, standard timers support between 1500W and 3500W. For LED lighting, even if the consumption is lower, it is always better to have a safety margin. Carefully check the technical specifications of your timer before purchasing, as I explain in this article on accessories.

Blog navigation

Latest posts

VIVOSUN Grow Cam 6mm 2K QHD WiFi Grow Camera

Tired of anxiety when you're away from your grow? The VIVOSUN Grow Cam 6mm 2K QHD WiFi Grow Camera lets you keep an...

Read more
STOP à la Tourbe ! Découvrez les 4 Meilleurs Substrats Écologiques pour une Culture Indoor Explosive

Le monde du jardinage connaît une transformation silencieuse mais profonde. Face à l'urgence climatique et à la prise...

Read more
Master Pack PRO Advanced Nutrients: Created by GrowLED for demanding growers!

When you're starting out or looking to optimize your indoor growing, the hardest part is often choosing the right...

Read more