Heaters for seedlings, cuttings, and germination: the warmth that makes a difference
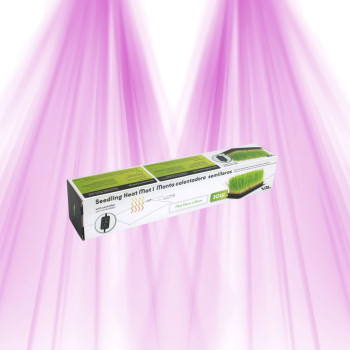
Heaters for seedlings and cuttings are essential equipment for creating optimal thermal conditions during germination and rooting. Whether with heating mats or heating cables, maintaining a constant temperature between 20 and 25°C at root level significantly boosts the success rate of your young plants. This is particularly crucial in winter or unheated spaces where substrate temperature can drop drastically.
Why use a heating system for your seedlings
Substrate temperature plays a decisive role in the speed and rate of germination. With soil at 15°C, some seeds can take 3 weeks to germinate, whereas at 22°C, they emerge in 5-7 days. Heating mats create this gentle, homogeneous heat zone that stimulates the enzymatic activity of seeds. For cuttings, it's even more critical: roots develop 2 to 3 times faster with basal heating than at ambient temperature.
The advantage of specialized heating systems is their precise regulation. Unlike ambient heating, which dries out the air, they directly heat the substrate without disturbing humidity. Models with integrated thermostats automatically maintain the target temperature, preventing overheating that can literally cook your seedlings. Frankly, once you've tried it, there's no going back.
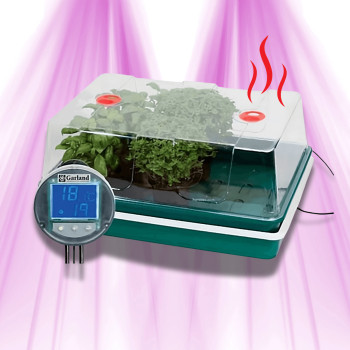
How to choose the right heater for your seedlings
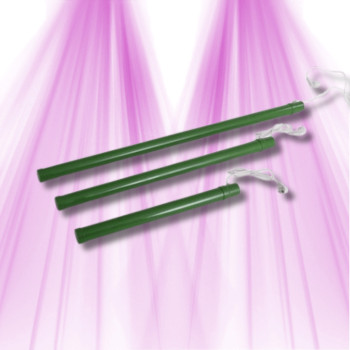
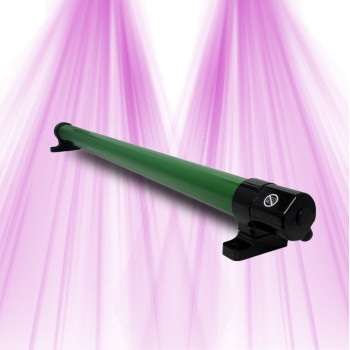
The size of your setup determines the type of heating to prioritize. For mini-greenhouses of 40x60 cm, a 17-watt heating mat is more than sufficient. Larger installations require either multiple mats or a heating cable snaking under the trays. Power is generally calculated at 10-15 watts per square meter of growing surface.
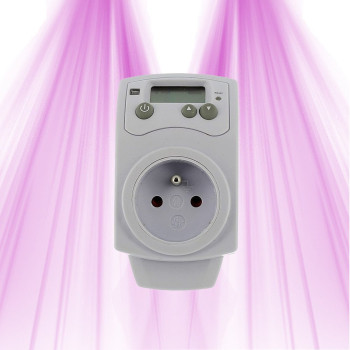
The thermostat is a key element often overlooked. Basic models have approximate regulation (±3°C), while digital thermostats offer a precision of ±0.5°C. For delicate seedlings like peppers or eggplants, this precision makes all the difference. Also check the probe length: it must be able to reach the center of your growing area.
Waterproofing is crucial in a humid environment. Look for a minimum IP65 standard, especially if you use automatic watering systems or misters. Mats with PVC coating resist water splashes better than those made of simple plastic. For safety, choose models with overheating protection and CE certification.
Frequently Asked Questions
What size heating mat should I choose for my seedling mini-greenhouse?
The basic rule is to cover 80% of your mini-greenhouse surface for even heat distribution. For a standard 38x24 cm mini-greenhouse, a 35x20 cm mat is perfect. If your greenhouse is 52x42 cm, opt for a 50x40 cm model. Avoid taking exactly the same size as your greenhouse: leave a 2-3 cm margin on the sides to prevent thermal bridges with the walls. A mat that is too small will create cold spots, while an overflowing mat will waste energy and risk overheating.
Should the heating mat be left on day and night for germination?
Yes, continuous heating is essential during the germination phase. Seeds need a stable temperature 24/7 to maintain their active metabolism. A nocturnal temperature drop can slow down or completely stop the germination process. However, once the seedlings have emerged and the first true leaves have appeared, you can reduce the temperature by 2-3°C at night to promote more robust development. A programmable thermostat allows you to automate these variations without manual intervention.
Heating mat or heating cable with thermostat, which is better for tomato and pepper seedlings?
For tomatoes and peppers, the heating mat is generally more suitable because it provides uniform heat over the entire surface. These solanaceous plants ideally germinate between 22 and 25°C, a temperature easily maintained by a good mat with a thermostat. The heating cable is better suited for custom installations or irregular shapes, but requires more precision in installation to avoid hot spots. For beginners, a 20-25 watt mat with a digital thermostat will be simpler to use and yield more predictable results. Heating cables are generally reserved for experienced growers who are already familiar with germination parameters.
How to safely install a heating mat under my growing trays?
Installation should be on a flat surface insulated from the cold ground. First, place an insulation board (polystyrene or cork, minimum 2 cm thick) then place the heating mat on top. Absolutely avoid direct contact with concrete, which would reduce efficiency by 40%. Then place your growing trays, avoiding piercing or bending the mat. The temperature probe should be placed in the substrate, not under the mat, to measure the actual root temperature. Ensure the power cable does not pass under heavy objects and always keep easy access to the outlet for quick disconnection in case of a problem.
How to clean and maintain a heating mat to prevent mold?
Cleaning should be done with the mat unplugged and completely cooled. Use a damp cloth with a mild detergent, never abrasive products that could damage the coating. Dry immediately with a dry cloth to prevent moisture infiltration into the connections. Between uses, store the mat in a dry, airy place, ideally suspended to avoid permanent creases. Regularly inspect the cable and connections: any sign of corrosion or degradation requires immediate replacement. Preventive maintenance every 6 months with thorough cleaning and electrical verification ensures an optimal lifespan for your equipment.