











































































Every year it's the same old story: you reopen the tent after summer, the dust has made itself at home, last harvest's substrate is still sitting in the pot, and the extractor fan is running a little weaker than it used to. Starting over on foundations like that means handing yourself avoidable trouble by the third week of the grow. This checklist works through each area in the order I tackle them at home, with the figures and the hands-on steps that make the difference between a clean restart and a cycle that drags its problems all the way to harvest. Let's go through it area by area, skipping nothing.
1 Cleaning and disinfecting the tent
A tent that has been in use all summer is never an empty shell. Spores of Botrytis cinerea (bud mould), powdery mildew and Pythium survive for months in the nooks, the seams and the floor of the tent. So do spider mite and thrips eggs. Reopening without disinfecting means re-seeding your next grow with the previous one's problems, often without seeing it coming until flowering.
In practice, I empty the tent completely, vacuum the walls and floor, then wash the reflective liner with a 3-6% hydrogen peroxide solution (less aggressive than bleach, and with no chlorine residue to damage the mylar over time). In the case of heavy contamination from the previous season (established spider mites, widespread powdery mildew), I move to bleach diluted 1 to 10, but then I rinse thoroughly with clean water and leave it to dry with the door open for 24 to 48 hours before any new plant goes in: a chlorine residue in contact with the roots does more damage than the original contamination.
The spots everyone forgets: the blades of the extractor and the fan (a layer of dust can cut the actual airflow by 20 to 30%), the LED lens (a film of dust reduces the perceived intensity by 10 to 15%), and the water reservoir where algae love to settle in. I also disinfect my pruning tools with 70° alcohol; an uncleaned pair of pruners is a classic vector for carrying problems from one cycle to the next.
🌱 Joseph's tip
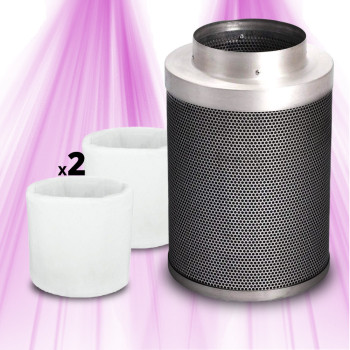
Never bleach a carbon filter. You dust it off dry, tapping it gently or blowing it out with compressed air, never wet: moisture clogs the activated carbon and you lose all its effectiveness in a single mistake.
2 Fresh substrate: starting from a healthy base
A substrate that has carried a plant to the end of flowering has little left to offer. Its cation exchange capacity (CEC, what lets it hold and then release nutrients) is exhausted, the residual salinity often lingers around 2 to 3 mS/cm when you want to restart below 0.8, and the physical structure has compacted: less porosity, so less oxygen available for young roots.
I almost always start again on fresh compost, light and lightly pre-fertilised like the Biobizz Light-Mix 20L Compost: it leaves you full control over the feeding programme from the very first watering, with no risk of a hidden overdose from an already-loaded base. If the budget forces you to reuse an old substrate, you need to flush it with water at pH 6.0-6.5 until the runoff comes out below 1.0 mS/cm, bearing in mind that the degraded physical structure itself cannot be repaired.
The container matters as much as the substrate. A 20L Fabric Pot works through air-pruning: roots that reach the wall meet the surrounding air and stop naturally instead of circling round and forming a suffocating root-bound tangle. The trade-off is that the substrate dries out faster: count on watering every 1 to 2 days in full flower, against 3 to 4 days in a classic plastic pot. A 20L volume suits a plant meant to reach 80-120 cm final height, no more, no less.

3 Getting the climate back up to spec: extraction and airflow
Tent climate is steered by VPD (vapour pressure deficit), not by temperature alone. This is the parameter that determines whether the plant transpires properly or is stressed. In veg, aim for 0.8-1.2 kPa; in flower, rather 1.0-1.6 kPa, climbing gradually. In concrete terms: 24-26 °C with the light on, 18-20 °C at night (a gap of more than 8-10 °C between day and night stresses the plant), and a humidity of 55-65% in veg dropping to 40-50% in flower. Above 55% humidity late in the cycle, the risk of Botrytis on tight buds climbs sharply.
To size the extraction, the calculation is simple: required airflow (m³/h) = tent volume (m³) divided by the desired renewal time (in minutes), multiplied by 60. A 120x120x200 cm tent is 2.88 m³; for a renewal every 2 minutes, you need roughly 86 m³/h in theory. In practice, you add 25 to 40% to offset the pressure losses from the carbon filter, the ducting bends and the total length. A TT MAX 125mm 2-speed Extractor Fan gives you that margin: low speed at night to preserve humidity and CO2, high speed during the day to absorb the heat peaks under the LEDs.
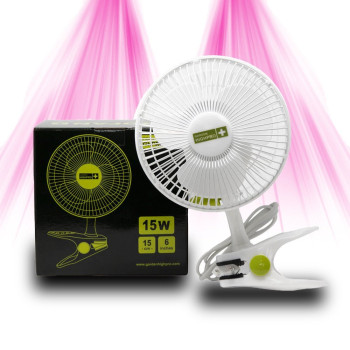
The extractor alone isn't enough. Without internal air movement, warm humid air stagnates in pockets around dense foliage, exactly where mould gets going. A Garden HighPro 15W Clip Fan reduces that boundary layer of stagnant air around the leaves, which also improves CO2 uptake, and strengthens the stems through thigmomorphogenesis (repeated movement toughens the plant, handy for supporting the weight of the buds late in flower). Position it to make the foliage ripple gently, never as a direct, fixed jet on the tops, which dries them out.
A mistake I see come up often: placing the extraction at the bottom of the tent. Warm air rises, so extraction should always be at the top, with the fresh air intake at the bottom.
4 Checking and choosing your lighting
The PPFD (the density of usable photons the plant receives) has to match the growth stage, not stay fixed from seedling to harvest. Aim for 100-300 µmol/m²/s for a seedling or a cutting, 400-600 in veg, 700-900 in flower (up to 1000-1200 only if the tent is CO2-enriched, otherwise it's just wasted watts). The DLI (daily light integral) is worked out like this: PPFD x photoperiod in hours x 3600, divided by 1,000,000. Example: 600 µmol/m²/s over 18h of veg gives 38.9 mol/m²/day; 800 µmol/m²/s over 12h of flower gives 34.6 mol/m²/day.
Before buying more, check what you already have. A dusty lens loses 10 to 15% of real intensity, and a clogged driver fan drives the temperature up and speeds up the diodes' degradation. After several years of intensive use, a yield drop of around 10% (the well-known L70 threshold) is normal: that's the signal to rethink your source rather than dig your heels in. The distance to the canopy also matters enormously because of the inverse-square law: moving a lamp by 10 cm can change the PPFD received by 15 to 20% at close range.
To choose or add a light source based on the tent's actual footprint, here is the matrix I use with the growers who come into the shop:
| Footprint / use | Lighting need | Recommended product |
|---|---|---|
| Top-up, small space, houseplant (~40x40 cm) | Low PPFD, broad spectrum | SpectraBULB X30, E27 30W bulb |
| Cloning, veg, mother plant | Blue-dominant spectrum, moderate PPFD | SpectraBUD M200 V2, 200W blue spectrum |
| 60x60 cm tent | Full veg/flower PPFD | Rhino Series 260 PRO, 200W plug & play with dimmer |
| 80x80 cm to 1 m² tent | High PPFD over a wider area | SpectraWILD S320, Samsung 320W bars |
| Large tent 100x100 cm and up | Even coverage over a large area | SpectraWILD M650, Samsung 650W bars |
The classic back-to-grow mistake is under-lighting a 1 m² tent with a single 200W panel: the centre gets a decent PPFD but the corners drop off noticeably, with visible yield differences between the plants on the edge and those in the middle.
🌱 Joseph's tip
Check the hanging height every week, not once for the whole cycle. The plant grows, so the distance to the source changes every week: readjust rather than trusting the first day's setting.
5 Easing nutrition back in gently
Fresh roots in a new substrate are not yet a functioning ecosystem. The microbial population that normally helps take up nutrients takes one to two weeks to reactivate in a freshly opened compost. Hitting it with the previous flower's EC means inflicting an osmotic shock on the young roots: water uptake drops instead of rising, and you get the opposite of what you were after.
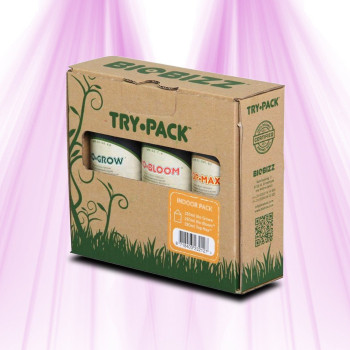
I always start at half dose, around 0.6-0.8 mS/cm EC, watering pH between 6.0 and 6.5 in a compost-based substrate. Biobizz Bio Grow suits this gentle restart well: its sugars and amino acids feed precisely the soil microbiology while it gets going again, rather than forcing a mineral feed that the roots aren't yet able to make full use of. You then climb gradually towards 1.0-1.2 mS/cm by the end of veg, always checking the runoff EC at the bottom of the pot: it must not exceed the watering EC by more than 0.3 to 0.5 mS/cm, otherwise there is salt build-up that needs correcting with a generous watering without feed.
On watering itself, it's better to lift the pot to feel its weight than to follow a fixed routine. Excess water drives oxygen out of the roots (hypoxia), which opens the door to Pythium, the very pathogen you've just eliminated by disinfecting the tent. On a fabric pot that dries out fast, that often means more frequent waterings but in more measured amounts, never the other way round.
6 Cycle planning: setting your back-to-grow calendar
A September restart is planned backwards from the harvest you're aiming for. Here is the calendar I generally keep for an indoor grow started at this time of year:
| Period | Stage | Markers |
|---|---|---|
| Week 1 (mid-September) | Setup, cleaning, sowing or cloning | Photoperiod 18/6, PPFD 100-300 |
| Weeks 2 to 5 | Vegetative growth | PPFD 400-600, EC 0.8-1.2 |
| Week 5-6 | Switch to 12/12, initial stretch | Height x1.5 to x2 in the first 2 weeks |
| Weeks 6 to 14-15 | Flowering (8 to 9 weeks depending on genetics) | PPFD 700-900, EC 1.2-1.6 then flush |
| Mid-December | Harvest | Milky/amber trichomes close to 70/30 |
One important nuance for autumn: the cooling outside air makes it easier to keep the tent cool, but it can also send humidity below 35% in full flower, which dries the buds out faster than expected. Plan to slow the extraction at night or add a top-up humidifier if your readings drop below that threshold. After harvest, count on 10 to 14 days of drying at 18-20 °C and 55-60% RH, then a cure in jars of at least 3 to 4 weeks before judging the final result: that's where half the aromas really come out.
What sets a successful restart apart from a shaky one is never the most expensive gear, it's the discipline on these six areas in order. I see too many cycles start badly because someone skipped the cleaning to save time, or reused the old substrate to save twenty pounds. Take the half-day it takes to reset everything, and your plants will pay you back over the whole cycle.
Ready to relaunch your grow on solid foundations?
Find the Biobizz Light-Mix 20L Compost, the TT MAX 125mm Extractor Fan and the Rhino Series 260 PRO for your tent, and everything else in one place.
See the whole growshop range →