










































































As soon as watering comes up, the conversation almost always turns to the reverse osmosis unit, the TDS meter, the right thermometer. After years spent fixing watering routines out in the field, I ended up shifting the question: once the water is properly prepared, how do you get it to the root without spoiling it again, and above all how do you know it is arriving at the right moment. That is exactly what I break down here, with the kit I actually use in the grow.
1What your water really carries
Before talking about watering, you have to look at what is actually in your tap water, because it never arrives neutral. Three things matter: hardness (limescale, meaning calcium and magnesium carbonates), the chlorine or chloramine used to disinfect it, and its baseline electrical conductivity, which is already there before you add a single drop of nutrient.
Hardness is not just a matter of white marks on the leaves. Water loaded with carbonates has a buffering power: it resists pH corrections and pulls the substrate towards the alkaline side watering after watering, which gradually blocks the uptake of iron and manganese even if you supply them in the right amount. It is a slow phenomenon, invisible for weeks, and then you end up with deficiencies that match no nutrient chart at all.
Chlorine, for its part, plays another role: it is there to kill micro-organisms in the drinking water network, and it carries on that job once poured into the pot, working against the microbial life of the substrate that we are precisely trying to protect in living soil culture. Chloramine is more stubborn than free chlorine; it takes longer, or a filtration step, to clear out.
Baseline conductivity, finally, often gets forgotten: if your tap water already carries a mineral load before you even add nutrients, and you aim for a target EC without accounting for it, you are in reality dosing stronger than planned. Over time this shows up as a build-up of salts in the substrate, visible around the edge of the pot or on the rims of the saucers.
- Common mistake: adjusting the nutrient pH without accounting for the buffering power of your base water, which gives corrections that do not hold over time.
- Common mistake: watering straight from the tap coming out of winter, when the network is especially loaded with treatment, without letting the water settle first.
- Common mistake: ignoring the starting EC of your water and relying solely on the dose printed on the nutrient bottle.

2Temperature, the parameter people overlook
Water that is too cold, in contact with the roots, literally slows down absorption: the root metabolism ticks over in slow motion, water and nutrients circulate less well, and the plant can react by temporarily folding its leaves in, like a small localised cold snap. It is especially common in winter, when you water with tap water taken straight from the network.
Water that is too warm or stagnant, on the other hand, loses its dissolved oxygen: in a reservoir left in full sun or in a heated grow room, the water warms up, deoxygenates, and encourages the conditions that favour root pathogens such as pythium, especially on substrates that stay wet for a long time.
What really counts is not aiming for one single, perfect number, but stability: roots cope better with water that is slightly cool but consistent from one watering to the next than with water that swings between icy and lukewarm depending on the day. This is where reverse osmosis and bringing the water up to temperature really come into their own: they prepare an even water, cleared of chlorine, left at room temperature before it is distributed.
The real issue, once that water is prepared, is to distribute it without passing back through an unmanaged source, and without churning it in a pump that reheats it and re-aerates it mechanically. That is exactly the thread running through the rest of this article.
🌱 Joseph's tip
My baseline routine: I always let my water rest out in the open in a jerry can or a reservoir for at least 24 to 48h before using it. That gives the chlorine time to evaporate and the temperature time to match that of the grow room, without doing anything else. It is simple, it costs nothing, and it is the foundation on which everything else (automation included) becomes reliable.
3What really matters: measure rather than guess
Here is the paradox I see most often: growers who spend a huge amount of time fine-tuning their water (hardness, chlorine, temperature) and who, once that work is done, still water by the calendar or by feel. A finger pushed into the substrate, a pot lifted to judge the weight. As a result, all the precision gained upstream is lost the moment it comes to distributing it.
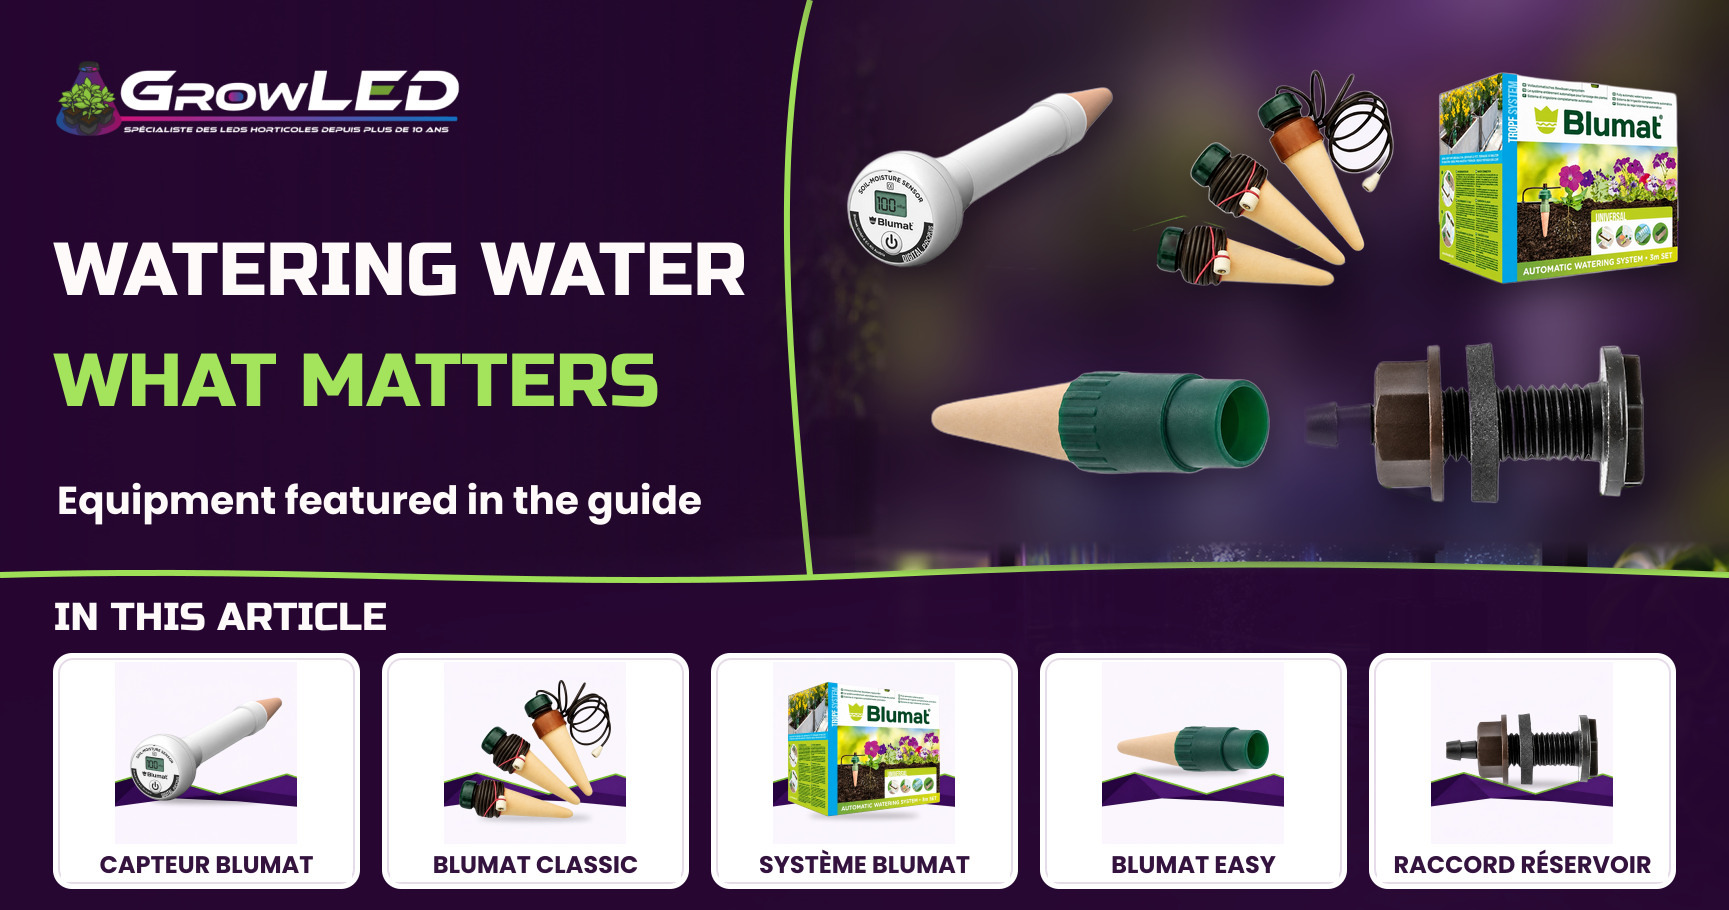
The Uber Digital Blumat Soil Moisture Sensor changes that logic: it is the only product in my selection that measures a real parameter rather than simply delivering water. It shows on screen the suction force of the substrate, in other words the effort the plant has to make to extract the water available, which reflects the real need far better than a fixed frequency.
In practice, the probe goes in at a depth of 15-18 cm, so into the active root zone and not just the surface where the substrate always dries faster than deeper down. The device is calibrated for pots up to 30 cm, which covers the vast majority of pot cultures.
Why it is the heart of the article: all the water preparation (corrected hardness, evaporated chlorine, stabilised temperature) is worth nothing if it arrives at the wrong moment. A measured number is always better than a habit, whatever the quality of the water used upstream.
4From managed water to the pot: applying without a tap
Once the water is prepared in a jerry can, the classic trap is to try to run it through a set-up designed for a pressurised water supply, which reintroduces exactly what you have just removed: fresh chlorine, variable pressure, a temperature that swings all over the place again.
The Blumat Reservoir Connector answers precisely that: its data sheet explicitly describes it as letting you connect the watering system without needing a mains water hook-up. It is designed for a container (jerry can, reservoir, barrel) and not for a tap.
Mechanically, it inserts 12 mm deep into the wall or lid of the container, with an 8 mm outlet diameter that then stays constant across the whole rest of the Blumat circuit. No electricity is involved: it is a passive connector that simply bridges the static water of the reservoir and the tubing that follows.
It is the pivotal component, the one that concretely embodies the whole logic of this article: prepare the water once, then automate it without ever running it back through an unmanaged source.
5Automating watering with water that is already prepared
The principle of the Blumat ceramic carrots rests on the porosity of the cone: when the substrate dries out, it creates a suction that draws water through the ceramic and moves it along the tube connected to the reservoir. When the substrate regains enough moisture, the internal pressure rebalances and the flow stops on its own, with no electronics and no timer. The system self-regulates on the plant's real demand.
What matters for water quality is that there is neither pump nor motor in this circuit: nothing reheats the water through friction, nothing re-aerates it mechanically. The water arrives as close as possible to the way it was prepared in the reservoir.
The Blumat Classic 3-Carrot Automatic Watering Kit is the logical entry point: it is the best-selling product in the whole range I use, which makes it the reference to mention first if you are only going to try one thing. Its data sheet states that it adapts to a variety of water containers, with a reservoir capacity of up to 6-7L per pot, exactly the format of a jerry can of water already corrected for hardness and brought back up to temperature.
The BLUMAT Automatic Watering System - 12 Plants - 3M x 8mm takes over at scale: its specifications mention direct compatibility with raised reservoirs and rain barrels, which is exactly the type of container used to let osmosis water rest. It runs with no electricity and no pump, and delivers by capillary action to 12 plants at once. It is the best-selling complete kit in the selection, so a choice validated by real use, not just by the data sheet.
| Product | Source container | Range | Operation |
|---|---|---|---|
| Blumat EASY (bottle) | Bottle 0.5 to 2L | 1 plant | Capillary action, no electricity |
| Blumat Classic 3 carrots | Variable container, up to 6-7L per pot | 3 watering points | Capillary action, no electricity |
| 12-Plant System 3M x 8mm | Raised reservoir, rain barrel | 12 plants | Capillary action, no electricity or pump |
| Reservoir Connector | Any jerry can or reservoir | Circuit connection | Passive, no electricity |
| Drip tube 8mm 10m | From reservoir or tap (with reducer) | The whole distribution line | Passive, frost-resistant |
🌱 Joseph's tip
A detail people often forget: even with a passive system, hard water leaves limescale deposits on the porous ceramic of the carrots over the months, which slows down their ability to absorb by suction. I inspect them regularly and soak them if they seem less responsive. Water that is already prepared upstream strongly limits this phenomenon, one more reason not to skip the preparation step.
6Test before you scale up: the bottle format
Before kitting out a whole grow, I nearly always advise validating the principle on a single plant. It is less a matter of budget caution than a way to check concretely how your prepared water behaves once in circulation, before investing in a 12-plant loop.
The Blumat EASY - Carrot for water bottle is made for that: it clips straight onto a 0.5 to 2L bottle, the exact format most growers use to test home-made osmosis water before rolling it out across their whole set-up.
Its data sheet quotes a dose of 0.2 L per day, which gives you a measurable reference point: you can compare your bottle's actual consumption with that figure, and adjust if your substrate or your grow climate strays from the average. It is a flow you can follow with the naked eye, unlike hand watering, of which you never really keep any record.
It is not an isolated test gadget, it is the second best seller of the whole range I use: real, widespread use at this scale, not just a marginal option before moving on to the serious stuff.
7Building your circuit from the reservoir
Once the reservoir connector is in place, all that remains is to physically link the container to the carrots spread across your pots. That is the job of the Drip tube ⌀ 8mm, 10m - Blumat, which completes the connector seen above to run from the jerry can to the pot without ever degrading the water on the way.
Its data sheet specifies that it resists frost and bad weather, which matters if your reservoir is installed outdoors or in an unheated greenhouse, and that it connects either via a top reservoir connector (the one described above), or via a tap fitted with a Blumat pressure reducer if you ever need to switch over to mains water.
The diameter stays constant at 8 mm over the whole 10 m length, which means it slots directly onto the carrots and connectors already presented, with no adapter or extra tinkering.
- Watch out: avoid leaving the tube in full sun over a long stretch; a dark tube that heats up can raise the water temperature just before it reaches the root, cancelling out part of the work done upstream.
- Watch out: keep the run free of sharp bends or pinches; capillary action works on very low pressures and a crushed tube is enough to cut the flow.
Prepare the water, let the rest run itself
To start simply, begin with the Blumat Classic 3-Carrot Automatic Watering Kit, and add the Uber Digital Blumat Soil Moisture Sensor to check objectively what is happening below the surface. The rest of the Blumat range is available on the growshop.
See the growshop →I think we often put the effort in the wrong place. Plenty of growers spend hours fine-tuning the hardness, the chlorine, the temperature of their water, and then water by feel, with water that passes back through a tube plugged in anywhere. What I have been trying to do for years is to treat the preparation of the water and its distribution as one and the same gesture: I prepare it once, in a reservoir, and then I automate it without reheating or artificially re-aerating anything along the way. And above all, I measure what is actually happening below the surface rather than guessing. It is that combination, water managed upstream and distribution measured downstream, that truly makes the difference over time, far more than a single perfect number in isolation.