GreenVisuaLED SPOT: Precision LED Lighting for Your Indoor Crops
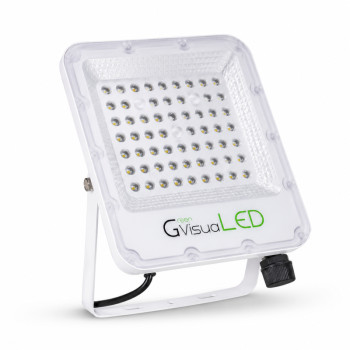
GreenVisuaLED SPOT LED spotlights represent a new generation of horticultural lighting designed specifically for indoor cultivation. These LED projectors combine light output and spectral precision to provide your plants with exactly what they need, whether for vegetative growth or flowering. With their compact design and advanced LED technology, they are perfectly suited for both restricted growing spaces and larger installations.
Unlike traditional HPS systems, which generate a lot of heat and consume a lot of energy, GreenVisuaLED spots focus on energy efficiency without compromising light intensity. Their optimized spectrum and carefully designed beam angle ensure homogeneous light penetration into the canopy.
Why choose GreenVisuaLED SPOT lighting?
The LED technology of GreenVisuaLED spots offers several decisive advantages over conventional lighting. First, their remarkable energy efficiency: where a 600W HPS lamp actually consumes 600W plus the ballast, an equivalent LED spot generally does not exceed 200-250W while delivering comparable PPFD. This difference directly impacts your electricity bill and the thermal management of your space.
The light spectrum of GreenVisuaLED spots is specially designed to maximize photosynthesis. They incorporate essential wavelengths: blue (400-500nm) for compact vegetative growth, red (600-700nm) to stimulate flowering, and often far-red (700-800nm) for the Emerson effect. This spectral precision allows for adapting the lighting to different development phases.
Installation is frankly simpler than with HPS systems. No bulky ballast to hide, no reflector to adjust, no oversized extractor fan to dissipate heat. A GreenVisuaLED spot attaches directly to the ceiling or to a rail, plugs into a 220V mains socket, and you're good to go. Thermal management is so much easier that you can often reduce extraction power.
How to choose your GreenVisuaLED spot
The choice of an LED spot mainly depends on the area to be lit and the type of crop. For a 60x60cm surface, a 100-150W spot is largely sufficient as supplementary lighting or for less demanding plants. For 80x80cm or 1m², you should aim for at least 200W. Beyond that, you can either opt for a more powerful spot or multiply the light points for better distribution.
The hanging height directly influences the intensity received by the plants. A 200W spot can be installed between 40 and 80cm from the canopy depending on the desired intensity. The higher you go, the wider the illuminated area, but the intensity decreases according to the inverse square law. It's a balance to find between light penetration and homogeneous coverage.
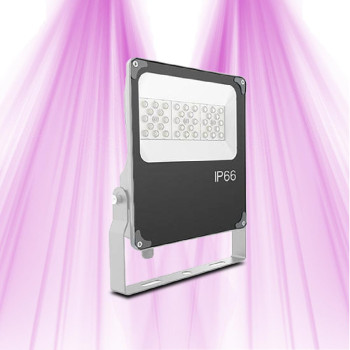
The IP protection rating is crucial in indoor cultivation where humidity can reach 70-80%. GreenVisuaLED spots with IP65 or IP66 certification are perfectly resistant to water splashes and ambient humidity. This protection ensures an optimal lifespan even in the most demanding conditions.
Regarding the spectrum, some models offer switches to adapt the lighting: "Veg" position with a blue dominance for growth, "Bloom" position with more red for flowering. Others offer a fixed full-spectrum optimized for all phases. The choice depends on your cultivation method and your experience level.
Frequently asked questions
What surface can the GreenVisuaLED SPOT 200W illuminate for an indoor vertical garden?
A 200W GreenVisuaLED spot effectively covers a surface of 80x80cm to 1m² as main lighting, or about 0.6 to 1m². For a vertical garden, this surface can be slightly extended because plants are arranged vertically and capture light differently. At 60cm distance, you get a homogeneous lighting area of about 1.2m wide by 1m high. For larger vertical gardens, it is preferable to install several spots spaced 80-100cm apart to avoid shaded areas. The light intensity will be sufficient for most ornamental and aromatic plants commonly used in indoor vertical gardens.
What distance should I maintain between the GreenVisuaLED SPOT and my plants to avoid light stress?
The optimal distance depends on the power of the spot and the sensitivity of your plants. For a 100W spot, maintain a minimum distance of 30-40cm; for a 200W, count on a minimum of 40-60cm. Young plants and cuttings are more sensitive: keep 50-70cm even with a medium-power spot. Monitor for signs of stress: curling leaves, bleaching foliage, or stunted growth. If your plants show these symptoms, move the spot an additional 10-15cm away. Conversely, excessively elongated internodes indicate a lack of light: gradually bring the light closer. A lux meter can help accurately measure the received intensity.
How to install the GreenVisuaLED SPOT V4 on a rail or ceiling in indoor cultivation?
Rail installation requires suitable supports usually supplied with the spot or available separately. First, fix the rail to the ceiling with anchors appropriate for the weight (count 3-5kg per spot depending on the model). The spot then clips onto the rail and can slide to adjust its position. For direct ceiling mounting, use the supplied hanging eyelets and adjustable chains to easily modulate the height. Check that your ceiling can support the weight and plan for a hanging point every 80cm maximum. The electrical supply is standard 220V; consider installing a dedicated circuit breaker if you are using multiple spots. Observe safety distances with irrigation systems to avoid any risk of water splashing on electrical connections.
Is the GreenVisuaLED SPOT suitable for a humid environment like a grow tent?
Yes, GreenVisuaLED spots are specially designed to withstand humid environments thanks to their IP66 certification. This protection guarantees total sealing against water splashes and dust, which is essential in indoor cultivation where humidity can reach 70-80%. The aluminum casing and sealing gaskets effectively protect the electronic components. However, ensure sufficient ventilation to avoid direct condensation on the lighting. In a grow tent, always install extraction at the top to evacuate hot and humid air. Avoid direct water splashes during watering and cleaning. This robustness allows for serene use even in the most demanding conditions of intensive indoor cultivation.
How to maintain and clean my GreenVisuaLED IP66 SPOT for a long lifespan?
Regular maintenance of your LED spot is essential to maintain its light performance. Clean the optics every 15 days with a slightly damp microfiber cloth to remove dust and condensation that reduce light efficiency. Avoid aggressive chemical products that could damage anti-reflective coatings. Check electrical connections monthly and tighten if necessary. Check the condition of the sealing gaskets, especially after several months of use in a humid environment. Dust the cooling fins with a soft brush to maintain optimal heat dissipation. A well-maintained spot retains 90% of its light output after 50,000 hours of use, which is about 5-7 years of intensive use. Store it in a dry place if you use it seasonally.