


















































































Looking for a simple photosynthesis diagram for Year 8 to understand how plants feed themselves? This article gives you a clear, level-appropriate explanation, along with effective visuals and easy-to-remember equations so you can master this topic without getting lost in complex theory.
How photosynthesis works in plants
The photosynthesis is plants' true superpower, letting them make their own food. In short, plants convert light, water and carbon dioxide into glucose and oxygen. It's as if they cook their own meal every day using energy from the sun.

The reactants needed for photosynthesis
Three ingredients are essential for photosynthesis to take place: sunlight, water and carbon dioxide. If any one of these is missing, the whole process stops. It's a bit like a recipe: without flour or eggs, you can't make a cake!
The water drawn up by the roots travels up to the leaves, while carbon dioxide gas enters through tiny openings called stomata. Light energy, meanwhile, is captured by the green cells of the leaf. The meeting of these three elements triggers an extraordinary chemical reaction inside the chloroplasts.
- Sunlight: captured by chlorophyll, the green pigment in leaves. It supplies the Light energy essential for kicking off the reaction.
- Water (H₂O): absorbed by the root hairs, it circulates through the plant. It's then split apart, releasing oxygen.
- Carbon dioxide (CO₂): this gas found in the air enters through the stomata. It serves as the raw material for the synthesis of glucose, the plant's food.
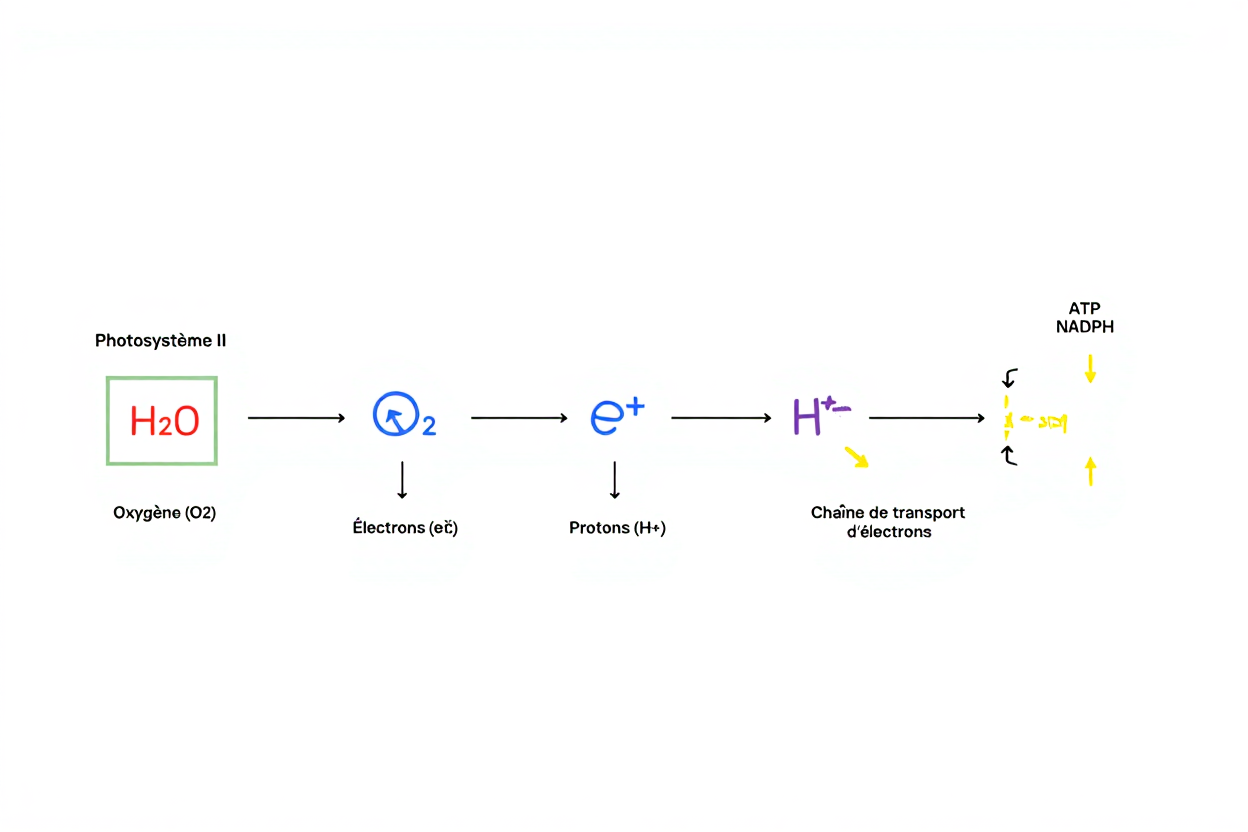
A chemical equation sums up this process perfectly: 6 CO₂ + 6 H₂O + light → C₆H₁₂O₆ + 6 O₂. The repeated number 6 makes this formula very easy to remember.
The role of chlorophyll and chloroplasts
The chlorophyll is an extraordinary molecule that acts like a natural solar sensor. It absorbs light and converts it into chemical energy the plant can use, all while giving it its green color. It mainly captures red and blue light, but reflects green.
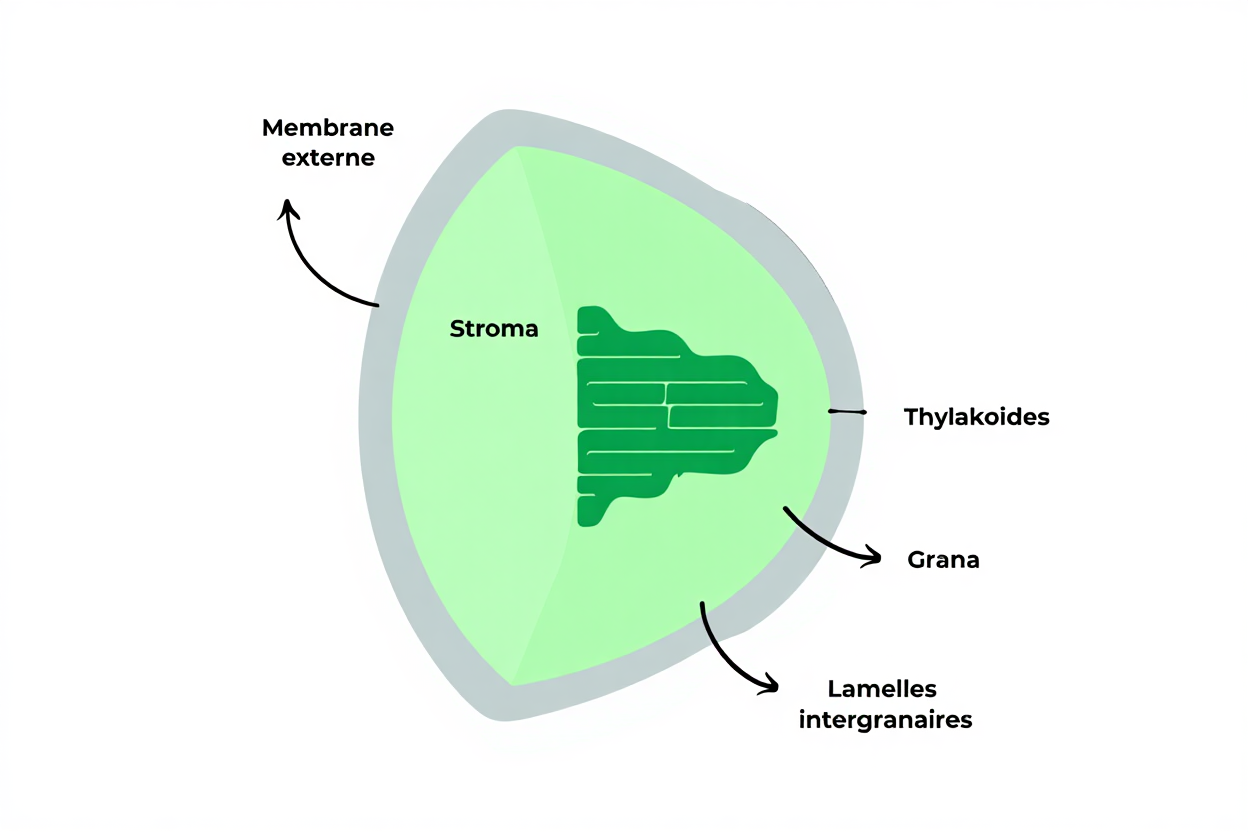
The chloroplasts are true little factories where sugar is produced. They contain the thylakoids, where the light-dependent phase takes place, and the stroma, where the Calvin cycle happens. It's in this miniature laboratory that CO₂ is converted into usable glucose.
The final products: glucose and oxygen
The glucose serves as fuel for the plant to grow and repair itself. Part of this sugar is converted into starch to be stored in the roots or fruit, for days without light.
The oxygen released through the stomata is an essential byproduct for life on Earth. A large part of the air we breathe comes from this work done by plants. This photosynthesis diagram shows just how completely animal life depends on this plant process.
Detailed photosynthesis diagram for middle school
A colorful diagram is essential for really understanding this fascinating biological process! A good photosynthesis diagram must clearly show the raw materials, the final products, and the exact location where the reaction takes place. With colored arrows and detailed labels, you can follow the complete path of each molecule inside the plant.

Visual representation of inputs and outputs
Making a diagram is a bit like telling a story where you see each character arrive and leave! The elements that enter the leaf are light, water and carbon dioxide. The ones that leave after synthesis are glucose (a type of sugar) and oxygen.
- Red arrow (light): comes from the sun and reaches the leaf's surface. It's what supplies the energy needed to kick off photosynthesis.
- Blue arrow (water): represents the water absorbed by the roots, which then travels up the stem via the xylem, all the way to the leaf cells.
- Yellow arrow (CO₂): shows the carbon dioxide entering through the stomata. This gas is drawn directly from the air around the plant.
- Green arrow (glucose): indicates the sugar produced, which leaves the reaction zone to be stored. This nutrient matter is then distributed to feed the whole plant.
It's important to label each arrow with its chemical symbol for quick, easy reading. This way, each component is easy to identify: H₂O, CO₂, O₂ and C₆H₁₂O₆, making the diagram both clear and visual.
| Element | Arrow color | Chemical symbol | Origin/Destination |
| Light | Red | Light | From the sun to the leaf |
| Water | Blue | H₂O | From the roots to the leaf (xylem) |
| Carbon dioxide | Yellow | CO₂ | From the air to the stomata |
| Glucose | Light green | C₆H₁₂O₆ | From the leaf to storage (phloem) |
| Oxygen | White | O₂ | From the leaf to the atmosphere (stomata) |
Circulation of water and mineral salts
Water doesn't just move around inside the plant; it's actively carried upward through vessels called xylem. The root hairs on the roots capture water and mineral salts from the soil and carry them to the chloroplasts. This journey supplies the leaf with the essential raw materials.
Once photosynthesis has taken place, the glucose that's formed travels back down through another network: the phloem. Unlike the raw sap that rises, this elaborated sap distributes food to the parts of the plant that need it, like the roots or fruit. It's a fascinating two-way circulation: water goes up, sugar goes down.
Color code for Year 8 students
Using a color code makes learning much more intuitive and easier to remember. Thanks to these visual cues, you can grasp the nature of each element without necessarily needing to read the labels. Our minds naturally associate red with energy and blue with water, which helps with memorization.
- Dark green: represents chlorophyll and the chloroplasts, the green factories where the reaction takes place.
- Sky blue: illustrates water's journey, from the roots to the leaves.
- Bright red: symbolizes the light and heat energy from the sun that reaches the plant.
- Pale yellow: indicates the carbon dioxide, that invisible gas found in the air.
By following this code, you get a diagram that speaks for itself, almost understandable without words. Students immediately grasp the dynamics of the exchanges thanks to this effective visual approach.
Consider including a box with the simplified chemical equation of photosynthesis: 6 CO₂ + 6 H₂O + Light → C₆H₁₂O₆ + 6 O₂. This formula sums up the entire process in one easy-to-remember line. Numbering the steps can also help keep the sequence of events in order.
Experiments and the importance of photosynthesis
Theory is fascinating, but observing photosynthesis in action is truly fascinating. With simple experiments you can do in class, this abstract idea becomes a concrete reality. Plants don't cheat: they produce exactly what they need, and you can see it for yourself.
Checking starch production with an iodine test
The iodine test is your best ally for proving that photosynthesis really works. starch you detect actually corresponds to the glucose converted and stored by the plant. When iodine is applied to a leaf containing this starch, it immediately turns blue-black, demonstrating the production of organic matter.
- Step 1: prepare two leaves: expose one leaf to direct sun sunlight for 24 hours and place another in total darkness. Patience is key, since the difference will come from whether or not they were able to produce starch.
- Step 2: soak in alcohol: this step removes the chlorophyll to reveal the true color of the plant tissue. The alcohol dissolves the green pigment and makes the hidden starch visible, a bit like developing a photograph.
- Step 3: add iodine: drop a few drops onto each previously decolorized leaf. The reaction is immediate: the exposed leaf turns blue-black, while the other keeps a pale beige tint, giving an unambiguous result.
- Step 4: interpret the results: the leaf exposed to the sun did indeed produce glucose and starch thanks to synthesis. The one left in the dark produced nothing, proving that light is essential for this production of organic matter.
This experiment clearly shows that without light, no starch production is possible. It perfectly illustrates how plants convert light energy into food. You get to see this chemical difference with your own eyes.
Learning activities to understand the process
A role-play activity helps you better understand how each element interacts during the creation of organic matter. Each student plays a key character: one represents light, another water, another CO₂, and so on. By moving in sync, students visualize the process in real time, which turns out to be far more memorable than simply reading about it.
- Photosynthesis role-play: assign the roles (light, water, CO₂, glucose, oxygen) and form teams. Each student understands the journey of their "molecule" and its final destination this way.
- Photosynthesis-respiration comparison: show that these two processes, although opposite, are complementary. photosynthesis Photosynthesis produces glucose and O₂, while respiration consumes them, forming a perfect cycle in nature.
- The plastic bag experiment: enclose a living leaf in a clear plastic bag for 24 hours. The condensation visible inside reveals the water released through transpiration, making the phenomenon tangible.
These activities turn abstract concepts into concrete, hands-on experiences. You're no longer just reading about photosynthesis — you see it and touch it. Learning then becomes a memorable experience.
The ecological role of photosynthesis for life
Without photosynthesis, Earth would probably be nothing more than a barren rock floating in space. This isn't an exaggeration, since this process generates the oxygen we breathe and recycles atmospheric CO₂. It is literally the foundation of all life on our planet.
Just think about tomorrow's meal: your salad was created thanks to photosynthesis. The ham in your sandwich comes from an animal fed on plants, which also depend on the production of organic matter. Every calorie eaten and every breath taken relies on this extraordinary chemical process kicked off by the sun.