



































































Growing indoors and noticing your plants stretching abnormally under your LED grow light? This stretching phenomenon is common in Cannaweed-style LED growing: it elongates stems, weakens the canopy, and reduces your yields. Let's look at how to properly set the light-to-plant distance, adjust intensity at each growth stage, and quickly correct excessive stretch to get stocky, productive plants.
Optimal LED grow light-to-plant distance
The distance between your light source and your plants is the key factor for limiting stretch: too far away, and light becomes insufficient, causing the plant to stretch to reach it. Here we give you precise distances based on your LED panel's wattage and the growth stage, so you can position your light with confidence.
How to avoid stretch at the start
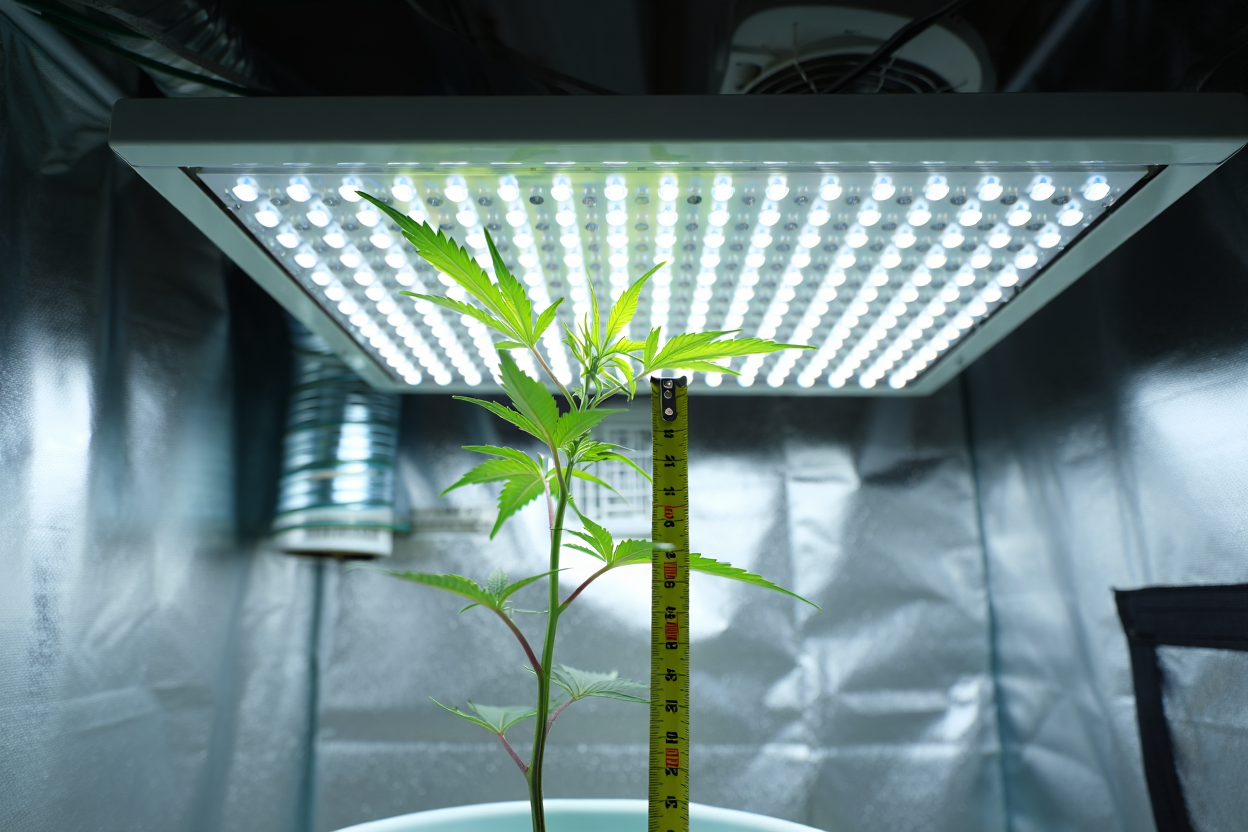
For young seedlings, keep a distance of 45 to 90 cm between the light and the top of the plants, with a light intensity of 100 to 400 µmol·m⁻²·s⁻¹. Start at around 60 cm and observe for 48 hours; if the stems grow more than a centimeter a day, move the light 5 cm closer and check again.
Remember that brightness drops off quickly with distance (the inverse-square law): at 2x the distance, the plant receives 4x less light! Make gradual adjustments of 2-5 cm every two days - regularity and precision are essential.
Typical distances based on actual wattage
During the vegetative stage, generally position your LED panels between 35 and 50 cm from the canopy to deliver 400-800 µmol·m⁻²·s⁻¹: about 30 cm for 200W, 35-45 cm for 300W, and 45-50 cm for 600W. Check the Cannaweed-style LED growing guides and use a PAR meter if possible to precisely measure the light received.
During flowering, you can move the light closer, between 25 and 45 cm, to reach 800-1,000 µmol·m⁻²·s⁻¹ (even 1,200 for some particularly demanding varieties). Careful: below 25 cm there's a risk of burns and stress, which can paradoxically amplify stretch! Start at 35 cm instead, then adjust in 5 cm steps based on how your plants react.
Recognizing and correcting stretch
The signs of stretch are easy to spot: thin, long stems, spacing between leaves greater than 5 cm, and excessive vertical growth (more than 2 cm/day).
To fix it, either move the LED grow light 5 to 10 cm closer, or increase light intensity in steps of 10-30% every 48h. Make sure the temperature at canopy level doesn't exceed 30°C, since heat also encourages stretch, even with cooler-running LEDs.
Mastering your LED grow light during flowering
The flowering stage is crucial, since the plant naturally seeks to stretch in order to develop more flowers. You need to progressively adjust the intensity and distance of the LED grow light to encourage compact flowers rather than overly long stems, all while limiting that unwanted stretch.
PPFD targets and gradual increases
The influence of light on photosynthesis is decisive during flowering: aim for 800-1,000 µmol·m⁻²·s⁻¹ without causing stress. Start in the vegetative stage at 50-60 % power (i.e., 400-600 µmol·m⁻²·s⁻¹), then gradually increase to 80-100 % between weeks 5 and 7, at which point 12 hours of light is enough.
- Weeks 1-2 (vegetative) : 50 % power at 40-45 cm, for about 400 µmol·m⁻²·s⁻¹, to avoid excessive elongation.
- Weeks 3-4 (pre-flowering) : move to 65-70 % over three days, keep the same distance, and watch for stretch.
- Weeks 5-7 (active flowering) : raise to 80-100 %, move the light to 35-38 cm if the canopy stays under 28 °C, to reach 800-900 µmol·m⁻²·s⁻¹.
- Week 8+ (ripening) : lower back to 70-80 % to avoid stress and optimize trichome maturity.
Increase intensity in small increments (5-10 % every 2-3 days maximum), never more than 20 % at once. If stretch persists, temporarily reduce to 45 % for 48h before resuming a gentler ramp-up to balance the canopy.
Temperature and humidity to monitor
With a grow LED, heat is often underestimated: even though an LED grow light runs cooler than an HPS, a canopy above 28 °C prompts the plant to stretch to cool itself down. So keep ambient conditions at 22-26 °C and check leaf temperature with an IR thermometer.
Humidity matters too: 50-60 % in vegetative stage, then 40-50 % in flowering for better respiration. If stretch continues, lower RH to 40-45 % for a few days and ensure good air exchange (at least 1 m³/min in a 120×120 cm grow tent) with a fan placed 20-30 cm above the plants.
Grow lights and plant yield
To get an optimal yield from your LED grows, it's essential to master how you set up your lights. Light intensity and distance from the plants directly influence canopy density. Discover our tips for properly configuring the Florastar and HLG models, and cleverly combine training with dimming to avoid stretch while encouraging compact growth.
Practical Florastar and HLG settings
The Florastar TI EX 500W LED panel offers a full spectrum (3000K/4000K/660nm) and has a built-in dimmer, making it easy to adjust intensity across the different phases of the growth cycle. During the vegetative stage, position it about 40 cm above the plants with dimming set between 60 and 70 %. This limits stem stretch. During flowering, gradually increase intensity (80-100%) to boost flower production while enjoying a quiet, fan-free system. Learn more about this high-performance LED panel.
Ideally, use 300-350 W at 40 cm during the vegetative stage, then move to 400-500 W in flowering, bringing the light slightly closer (35-38 cm). If canopy temperature exceeds 30°C, move the light 5 cm further away or improve ventilation. If stretch occurs, temporarily increase the distance (45-50 cm for a few days) before returning to a closer position.
With the Quantum Board HLG 648+, which runs cool, maintain a distance of 45-60 cm during vegetative growth and 30-45 cm during flowering, depending on the variety. Check PPFD regularly to stay within the recommended ranges: 400-600 µmol/m²/s during vegetative growth and 800-1000 during flowering.
Training and canopy uniformity
LST or SCROG helps even out light distribution by controlling canopy height from the very first weeks. These techniques, detailed in our indoor LED growing guide, prevent excessive stretch and encourage the development of multiple flowering tops. The result: a stockier plant and a better yield.
Keep a height-to-width ratio under 30 %. If needed, adjust the light distance or step up training. An oscillating fan, placed 30-45 cm away, strengthens plant structure and improves airflow under the canopy during light hours.
Managing dimming and nutrients
To avoid light stress, start with dimming at 25% for two days, then gradually increase (10% per day) until you reach 60% during vegetative growth and 100% during flowering. This gradual approach helps avoid excessive stretch early in the cycle.
During flowering, favor phosphorus and potassium while reducing nitrogen. Water only when the substrate is slightly dry, and maintain a temperature of 22-26°C for a dense canopy and a quality yield.
Why plants stretch under grow lights
Understanding what triggers stretch lets you step in before your harvest is affected. We'll take a detailed look at how LED spectrum, actual wattage, and growing techniques influence plant development, so you can keep a nicely compact canopy throughout both the vegetative and flowering stages.
Spectrum, actual wattage, and hot spots
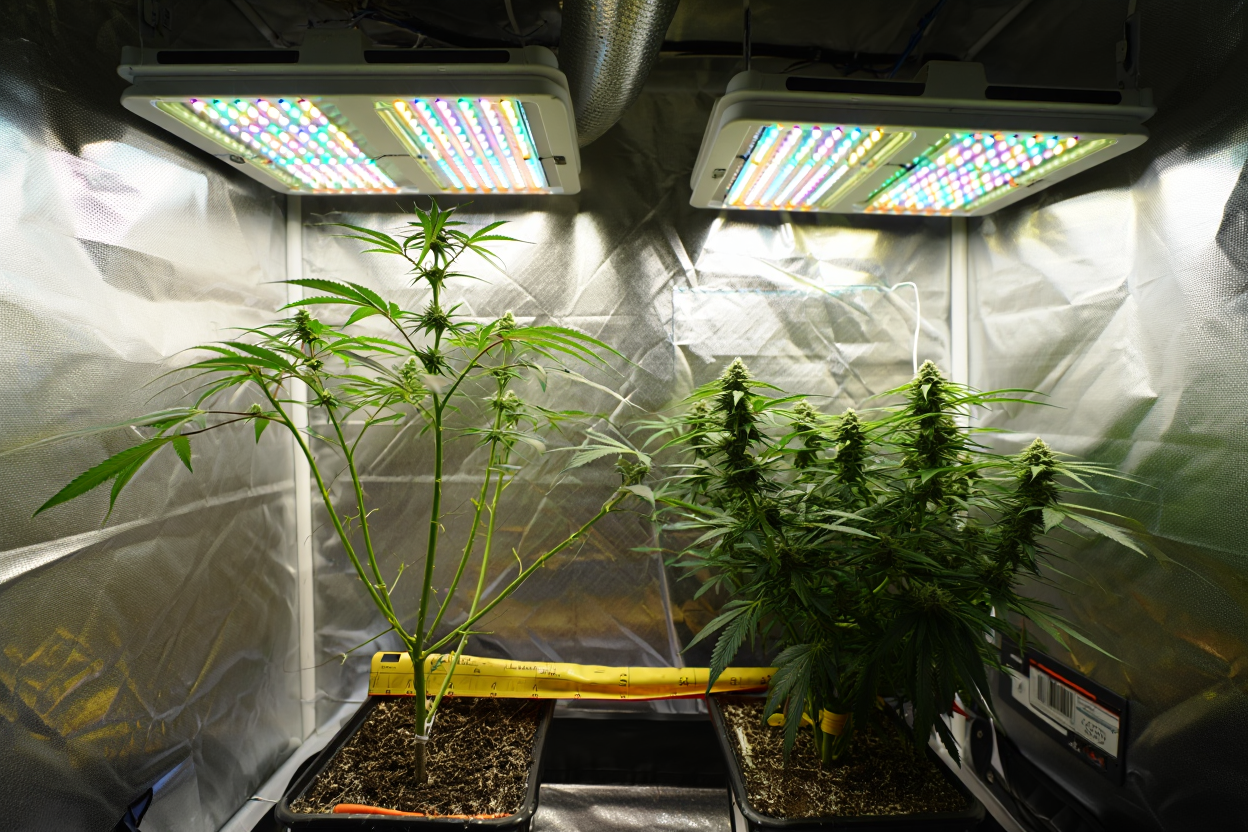
Some panels advertise a high theoretical wattage while their actual consumption stays low, which results in insufficient PPFD. The result: your plants stretch to reach more light. At Canna LED, we systematically check three key parameters before installation: power consumption, measured PAR, and optimal distance.
- Blue spectrum : Keeping at least 30% blue during vegetative growth shortens internodes and limits elongation.
- Red and far-red spectrum : During flowering, an excess of far-red (720-740 nm) increases stretch - precise dosing is essential.
- COB LEDs : These intense light sources penetrate the canopy well but create hot spots - slightly increase the distance or use a diffuser.
- Thermal management : Even though LED technology runs cooler than HPS, poor extraction creates hot zones that push the plant to stretch toward cooler air.
We eliminate hot spots using matte reflectors, then check light uniformity with a PAR meter. If any zone drops below 120 µmol/m²/s, we adjust either the light height or add supplemental lighting. Careful: an imbalance between red and blue means guaranteed stretch.
Watering and ventilation practices
Overwatering produces soft tissue that encourages elongation. Let the substrate dry out slightly between waterings for strong roots and sturdy stems. In one-bud LED SoG grows, this moisture control helps produce an even, easy-to-manage canopy.
Properly set ventilation ensures both air exchange and stem strengthening. Position an oscillating fan about 30 cm above the plants, at medium speed, for optimal air movement without drying out the foliage. This evens out the temperature, eliminates hot zones, and reduces heat-driven stretch.
If you're using an 18/6 photoperiod, temporarily switching to 16/8 can slow elongation, since reducing daily light hours slows vertical growth. Keep humidity between 50-55% for ideal growing conditions. Above 60%, tissue stays soft and the plant stretches more during the first hours of light.
Stretch solutions for LED grow lights during flowering
Now we've reached the crucial moment: controlling stretch during flowering to make the most of every available centimeter and improve yields. Discover our practical settings, a simple measurement method you can repeat, and clear indicators for adjusting distance or light intensity at the right time.
Product settings and useful links
The HLG Quantum Board 648+ Diablo stands out for its tailored spectrum, low heat output, and compatibility with all hanging systems. With no built-in driver, this LED light maintains a stable temperature and delivers even light intensity, perfect for controlling stretch without risk of burning. Choose the Quantum Board 648+ to control stretch under LED. By following this indoor LED growing guide, you can fine-tune your lighting based on how your different varieties respond.
Measurement and adjustment routine
Every week, we measure PPFD at the center of the canopy and then in the four corners of your grow space. We systematically log the distance between the light and the plants, the dimming percentage, leaf temperature, and the time of each reading. This rigorous method, favored by the cannaweed community, turns a good grow into an exceptional harvest.
- Week 1 : set your PPFD, distance, and temperature baselines; mark the canopy height on your pots.
- Weeks 2-3 : check weekly; if the canopy grows more than 30%, reduce the distance by 5 cm or increase intensity by 10%.
- Week 4+ : measure every 3-4 days during full flowering to stabilize canopy height.
We recommend adjusting light height in small steps of 2 to 5 cm maximum. Log every change with the date and notes in your grow journal so you can reproduce winning settings in your next growth cycle.
When to correct, and by how much
If your plants grow more than 2 cm a day for 3 consecutive days, immediately move the LED grow light 5 cm closer and observe for 48h. Stretch continues? Move it 5 cm closer again or increase intensity by 10%, but avoid exceeding 10 cm or a 20% increase in one go.
When canopy height exceeds a 30% height-to-width ratio, apply techniques like LST or SCROG to spread your plants out horizontally, and maintain a distance of 35-40 cm. Keep canopy temperature between 22-28°C; beyond that, move the lights slightly further away or increase ventilation. Plan for 4-5 weeks of vegetative growth to rein in vigorous varieties before switching to 12/12. These careful adjustments guarantee an abundant flowering with dense, resinous flowers.
| Growing stage | Target PPFD (µmol·m⁻²·s⁻¹) | Recommended distance | Power (dimming %) | Adjustment signs |
| Seedlings | 100–400 | 45–90 cm | 25–40 % | Drying out, growth >1 cm/day |
| Vegetative | 400–600 | 35–50 cm | 50–70 % | Internodes >5 cm, pale leaves |
| Pre-flowering | 600–800 | 30–45 cm | 65–80 % | Growth >2 cm/day, thin stems |
| Full flowering | 800–1,000 | 25–40 cm | 80–100 % | Leaf burn, temperature >30 °C |
| Ripening | 700–900 | 30–45 cm | 70–80 % | Chlorosis, oxidative stress |