



































































Do you have questions about the ideal height for installing your LED grow light to optimize plant growth without risking burns? If the lamp is too close, it can cause harmful heat stress; too far, the excessive distance reduces photosynthesis efficiency and stretches the stems. This guide teaches you how to determine the right distance based on power, growth stage and the size of your grow area.
Lamp hanging height and growing
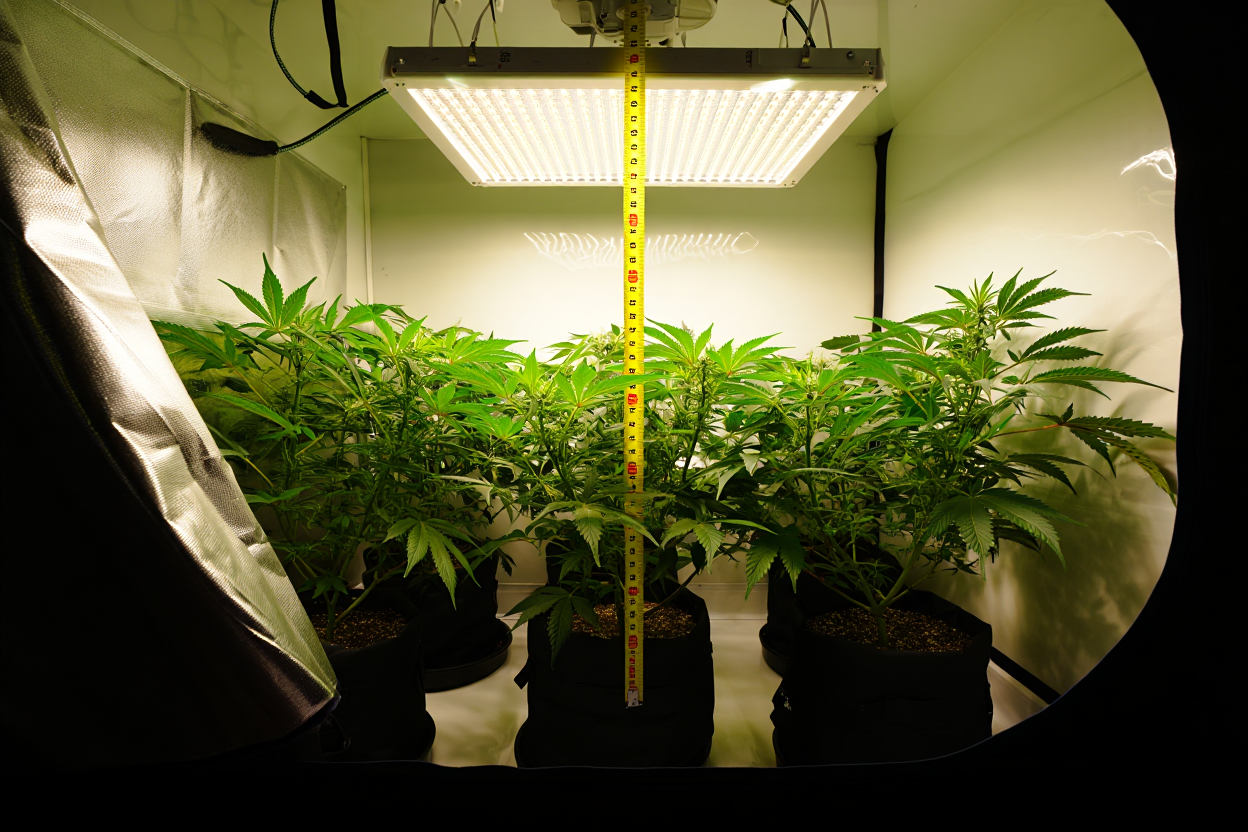
Setting the height of your LED grow light correctly helps avoid burns and stretching right from the seedling stage. Each phase, whether vegetative or flowering, requires a specific light intensity (measured in PPFD), which you can adjust by playing with distance and power. Always start with the recommended upper range, observe for 48 hours, then gradually bring the lamp closer in steps of 5 to 10 cm if your plants stay compact.
What height for seedlings and vegetative growth
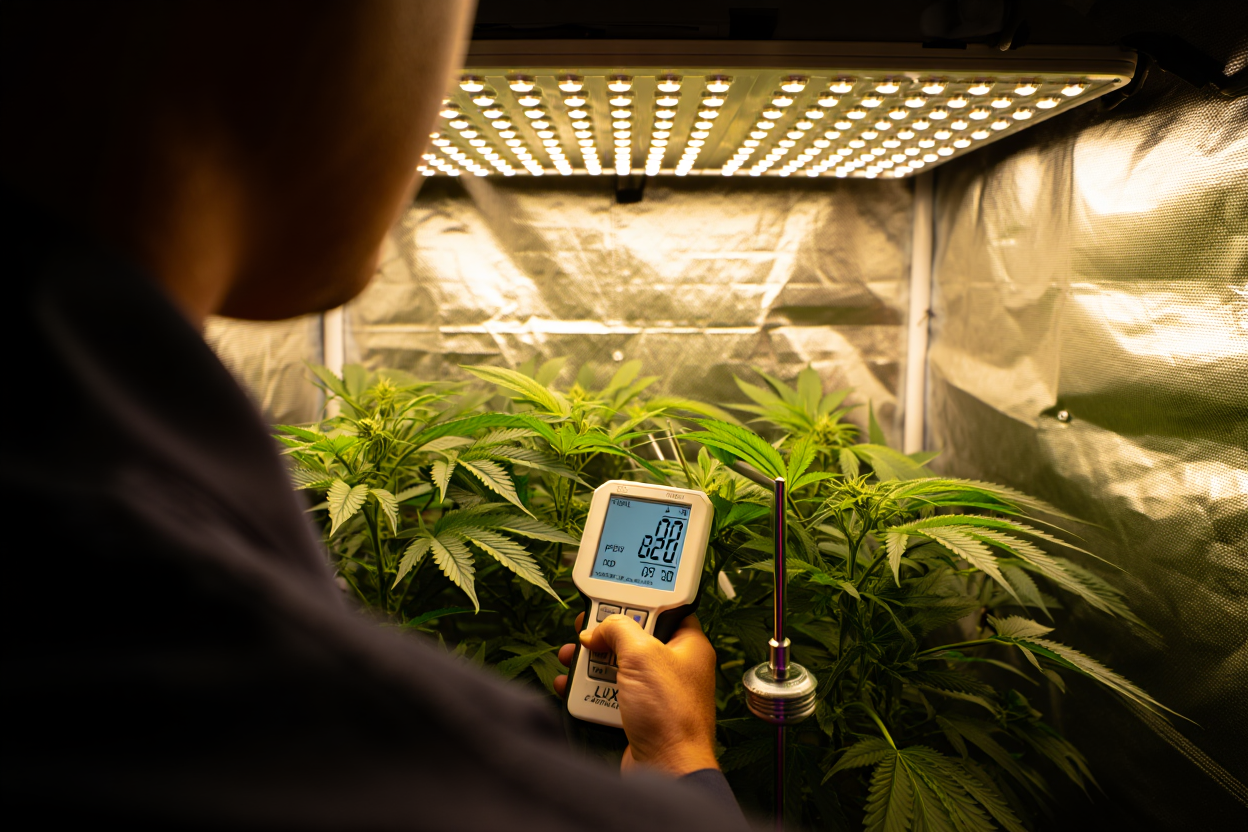
For delicate seedlings, keep your grow light at 60 cm to provide gentle lighting of 100-300 μmol/m²/s (PPFD). Once the seedlings develop two pairs of true leaves, lower the lamp to 45-55 cm for the vegetative stage, which reaches 400-600 μmol/m²/s and promotes compact, vigorous growth. The hand test or a PAR meter will help you find the right distance without exceeding the ideal light intensity.
Signs to watch for and adjustments
If the upper leaves turn white or brown, that's a sign of excess light: move the lamp further away or reduce its power by 20%. Thin stems, pale foliage or overly spaced internodes, on the other hand, indicate a lack of light: bring the grow light 5 cm closer and slightly increase the intensity. Also make sure to keep leaf temperature below 30°C, since beyond that, photosynthesis slows down and growth stalls.
Check your settings every week, especially as the canopy grows and naturally reduces the lamp-to-plant distance. In a grow tent with several varieties, place sensitive plants on the sides and the more demanding ones in the center, then adjust the LED height. Take notes: after a few growing cycles, you'll know exactly which distance works best for each setup.
At the start of flowering, gradually lower the lamp to 35-45 cm to reach 800-1000 μmol/m²/s and stimulate flower production. Toward the end of the cycle, you can sometimes go down to 30 cm if ventilation properly controls heat stress, which maximizes yield. Discover our recommendations for LED grow lights: you'll see that precise tuning makes all the difference!
Set power first, then height
Start by adjusting the power with the dimmer, then change the height of your LED grow light to fine-tune the light intensity. For a surface under 1 m², 250 W at 50 cm is enough, while 600 W would require more than a meter of distance. With a panel like the HLG 600 B-Spec, start at 60% power and 60 cm, then gradually increase if everything is going well.
Without a dimmer, adjust only the distance: a fixed 600 W panel should stay at 80-100 cm during the vegetative stage. SCROG or LST techniques, which flatten the canopy, allow you to use 60-80% power at a height of 76-102 cm while keeping a uniform intensity. Adjust in small steps (5 cm or 10% of power) until you get dark green foliage, tight internodes and healthy growth.
Grow light and distance by power
Your lamp's power directly influences the ideal distance to avoid heat and light stress on your plants. For a 150 W lamp, a distance of 30 to 40 cm is optimal during flowering, while a 600 W model will instead require 60 to 80 cm. Mastering this relationship between power and distance lets you optimize energy efficiency while ensuring healthy growth.
Settings for 300 W and 600 W
For a 300 W LED grow light:
- Seedlings: Position at 25-30 cm with 60-70% power to avoid stretching of the young shoots
- Vegetative stage: 45-60 cm with 70-80% power, providing a PPFD of 400-600 μmol/m²/s
- Flowering: 45-55 cm to reach 800-1000 μmol/m²/s with good ventilation
With a 600 W LED:
- Vegetative stage: Start at 80-100 cm then gradually reduce by 5 cm every 3 days
- Flowering stage: 60-70 cm under ideal conditions, 70-80 cm if ventilation is limited
Practical tip: With models ≥600 W, always start at the maximum recommended distance, observe your plants for 48h, then adjust gradually. If you see signs of stress (white or curling leaves), move the lamp 10 cm further away or reduce power by 10-20%.
Influence of spectrum and heat
The light spectrum plays a key role in determining the optimal distance:
- Purple panels (3-5W) rich in blue/red: 70 cm during vegetative growth, 60-65 cm during flowering
- Full-spectrum COBs: 100 cm during the vegetative stage, 90-95 cm during flowering to avoid hot spots
For an effective grow setup under cannaweed-style LEDs, favor bars fitted with Samsung LM301 or Osram chips, which allow you to get as close as 30-45 cm during flowering. Note: a spectrum including UV/IR requires 5-10 cm extra due to the increased heat.
The Ti PRO 670W model (3.03 μmol/J) ideally covers 1.2 x 1.2 m:
- 40-50 cm during vegetative growth
- 50-60 cm during flowering
Discover the optimal settings for this LED grow panel
Important: A reduced distance increases both light intensity (PPFD) and temperature. Effective air exchange (every 3-5 min) lets you go down to 30-40 cm at the end of the cycle. In summer conditions or with limited ventilation, keep 50-60 cm and monitor leaf temperature with an IR thermometer.
Heights by grow area size
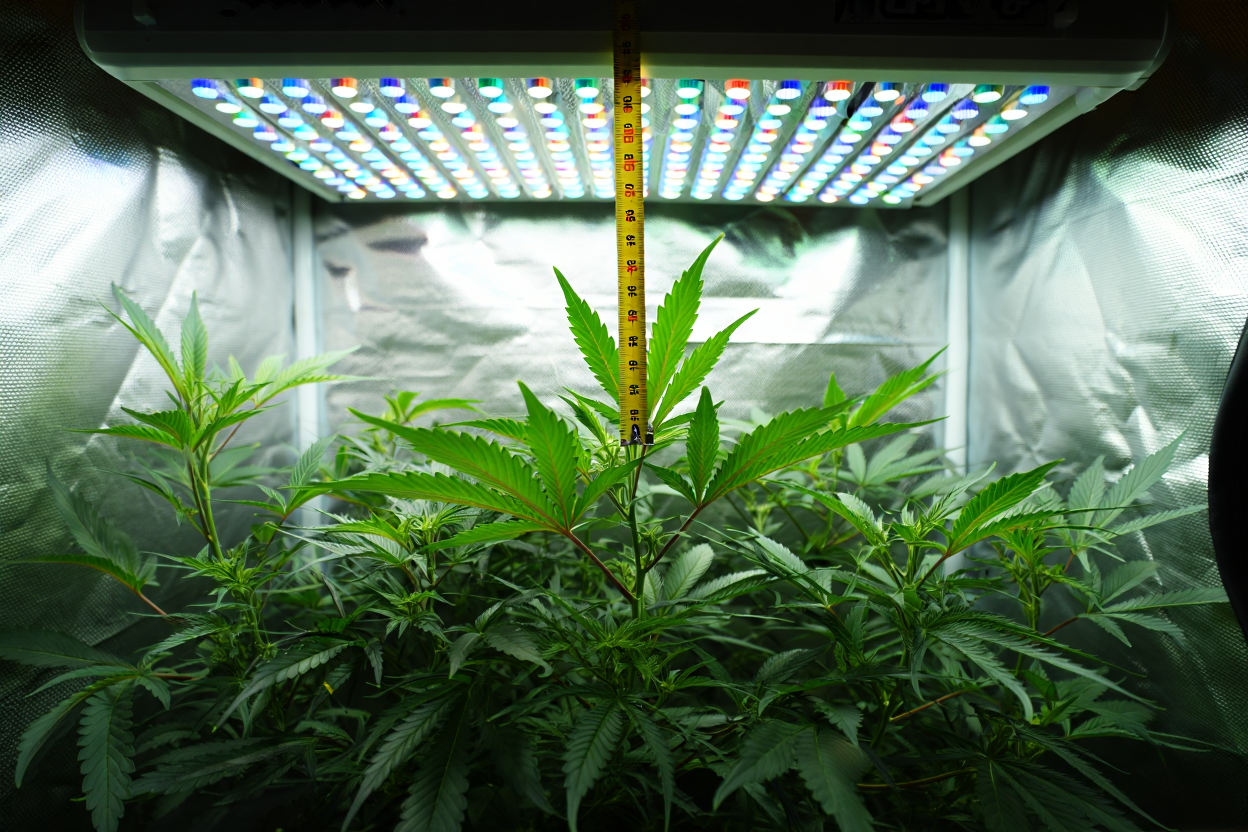
The size of your grow area determines the ideal LED grow light height for optimal light distribution. A small 60 x 60 cm box requires a smaller lighting distance than a 150 x 150 cm tent, since the light is concentrated over a smaller surface. Correctly setting the LED height helps avoid stretched plants, balances PPFD and improves yields while keeping energy consumption reasonable.
60 x 60 cm to 150 x 150 cm
For a 60 x 60 cm box, plan for a LED-to-plant distance of 25 to 30 cm. Start at 45 cm initially, then adjust based on the heat given off by the lamp. This lighting distance lets you fully exploit the power of a Quantum MAX 150 W without losing photons at the edges. In a 90 x 90 cm space, slightly increase the height (30-45 cm) to maintain an optimal PPFD: 400-600 μmol/m²/s during vegetative growth and 800-1000 μmol/m²/s during flowering (measurements to be taken at the center and corners).
- 60 x 60 cm box (Quantum MAX 150 W): Start at 45 cm, then adapt between 30 and 60 cm depending on the growth phase and temperature.
- 90 x 90 cm box (200-350 W): Keep 30-45 cm to avoid too big a gap between the center and the edges.
- 120 x 120 cm box (400-600 W): Choose 30-40 cm if your LED bars are well ventilated, otherwise 40-50 cm to better manage heat.
In a 150 x 150 cm space, keep a distance of 30 to 45 cm to ensure even light distribution and avoid hot spots. To check uniformity, measure PPFD at 9 points with a PAR meter: the gap between the minimum and maximum values shouldn't exceed 15%. This guarantees balanced growth across the whole grow area, even with several LED panels.
| Area | Recommended height | Vegetative PPFD | Flowering PPFD |
| 60 x 60 cm | 30-45 cm | 400-600 μmol/m²/s | 800-1000 μmol/m²/s |
| 90 x 90 cm | 30-45 cm | 400-600 μmol/m²/s | 800-1000 μmol/m²/s |
| 120 x 120 cm | 30-40 cm | 400-600 μmol/m²/s | 800-1000 μmol/m²/s |
| 150 x 150 cm | 30-45 cm | 400-600 μmol/m²/s | 800-1000 μmol/m²/s |
SCROG techniques and micro-spaces
SCROG and LST methods flatten the canopy and require a very precise LED-to-plant distance for cannaweed-style setups to avoid burns. Position your lamp between 76 and 102 cm above the net, with power set between 60 and 80%. This widens the lit area, evens out the PPFD and minimizes the risk of bleaching on the tallest colas.
In a micro-space (less than 1 m²), favor reducing power rather than an excessive height. Keep 50-75 cm of distance and adjust intensity between 40 and 70% to get the desired PPFD without overheating. If the tips turn white, first increase the distance by 5 cm before lowering the power further, to preserve the effectiveness of the light spectrum.
Aiming for PPFD uniformity
PPFD uniformity is just as crucial as its intensity: a lamp that's too close creates an overly intense light spot in the center while leaving the edges in shadow. For example, at a height of 40-50 cm, an LED will cover a 120 x 120 cm space better than at 25 cm, even though the latter position gives a higher peak PPFD. Aim for a uniformity rate of at least 85% (min/max PPFD ratio).
To get started, set your lamp to 60% power and 60 cm height, then gradually bring it closer over 10 days while observing how the plants react. If the edges stretch, raise it by 5 cm; if the foliage yellows, bring the lamp closer or slightly increase the power. This gradual approach will let you find the ideal setting for your type of lamp and your setup, turning your grow area into a truly controlled laboratory.
Practical settings for lamp and growth
To move from theory to practice with your grow light, here are concrete tips that will save you from costly mistakes. Learn to precisely set your lighting, control heat in your grow area and get the most out of high-performance models with their optimal distances. When your LED grow light is well configured for the vegetative stage or flowering, your plants grow faster and become more vigorous.
Quick setting tips
For a 600W lamp during flowering, the ideal distance is between 60 and 70 cm in a well-ventilated tent. This gives a PPFD of 800-1000 μmol/m²/s without exceeding 28-30°C on the leaves. Start at 70 cm with 80% power, check after 48h that there are no burns, then gradually go down to 60 cm if everything is fine. Then increase the light intensity to 90-100% during the last three weeks to boost photosynthesis and densify your harvests.
- Hand test: hold the back of your hand at plant height for 30 seconds. Too hot? The lamp is too close. Too cold? It's too far. A gentle warmth indicates the right distance.
- Gradual adjustments: change the LED height in steps of 5-10 cm or the power by 10% max, then wait 48-72h before making a new adjustment.
- Watching the internodes: 2cm internodes indicate perfect lighting. Beyond 4cm, increase the power or lower the lamp.
- Light uniformity: measure the PPFD at the center and corners - the gap should be under 15%.
Without a measuring device, the Photone app (well calibrated) gives an approximation within 10% to set your LED grow light. Always note down the height, the distance, the PPFD, the power and the growth stage. After a few cycles, you'll identify the optimal settings.
Managing heat and ventilation
Setting the LED height goes hand in hand with heat control. A lamp like the HLG 600 B-Spec (2.9 μmol/J) gives off 180-200W of heat. Too close to the plants, leaf temperature exceeds 30°C, stopping photosynthesis. Install an extractor exchanging the air every 3-5 minutes and an oscillating fan to disperse the heat.
In small spaces, reducing power is often better than increasing distance: a 300W at 60cm gives off less heat than a 600W at 1m. If the temperature exceeds 30°C, keep at least 50cm and lower the intensity to 60-70% to protect your crop.
Use a thermo-hygrometer to monitor temperature and humidity. During the vegetative stage, if you exceed 28°C or drop below 40% humidity, raise the lamp by 5-10cm or lower the power by 10%. With good ventilation, you can go down to 30-35cm at the end of flowering without risk.
Product references and heights
The HLG 600 B-Spec covers 1.8x1.8m: - Vegetative stage: 70-100cm at 60-100% - Start of flowering: 60-70cm - End of cycle: 50-60cm (with optimal ventilation)
The Ti PRO 670W offers 4 independent channels: - Seedlings: 60cm at 30% - Vegetative stage: 45cm at 70-80% - Flowering: 35cm with deep-red activated
The Quantum MAX 150W grow light is ideal for 60x60cm boxes: - Starting position: 45cm - Adjustment based on power: 30-60cm Discover how to optimize your LED lighting
Golden rule: always start at the maximum recommended distance, then bring it closer in small 5cm steps while observing your plants. Note down every change and take regular photos. This method will guarantee perfect control of power, distance and light intensity for exceptional harvests.